- My Forums
- Tiger Rant
- LSU Recruiting
- SEC Rant
- Saints Talk
- Pelicans Talk
- More Sports Board
- Fantasy Sports
- Golf Board
- Soccer Board
- O-T Lounge
- Tech Board
- Home/Garden Board
- Outdoor Board
- Health/Fitness Board
- Movie/TV Board
- Book Board
- Music Board
- Political Talk
- Money Talk
- Fark Board
- Gaming Board
- Travel Board
- Food/Drink Board
- Ticket Exchange
- TD Help Board
Customize My Forums- View All Forums
- Show Left Links
- Topic Sort Options
- Trending Topics
- Recent Topics
- Active Topics
Started By
Message
 0
0

Posted on 2/8/19 at 7:18 pm to anewguy
A ballpark price would be nice as well not detailed just within a few cases of beer cost minus the cost of the beer during construction.

Posted on 2/8/19 at 10:38 pm to Four Leaf Tayback
quote:
Could you or someone please post a Material list of what you use to build the box itself for a 4x4, 4x6 or 6x6?
I'll update the OP for a rough pricing so far and what it's cost up to this point.
EDIT: I see that snapper made this suggestion on page 2. Solid info.
Another suggestion a coworker made is to build the walls in sections and get the base of the stand in the air before we put walls on it. He said this is exponentially easier than having to screw plywood walls onto it while on a ladder. It also has the added benefit of keeping weight down to get the base up in the air. That will make it far simpler than worrying about weight getting it up there. Obviously putting the wall sections on will be a 2+ person affair but I think it'll be easier.
Updating the OP now with materials so far.
This post was edited on 2/8/19 at 11:13 pm

Posted on 2/8/19 at 10:41 pm to bapple
Look forward into seeing the progress

Posted on 3/1/19 at 11:53 pm to bapple
Bapple and I got more work done. Framing stuff.

One with my pet black panther.

One with my pet black panther.
Posted on 3/2/19 at 2:02 am to ChatRabbit77
Nice black panther
Posted on 3/2/19 at 4:11 pm to bapple
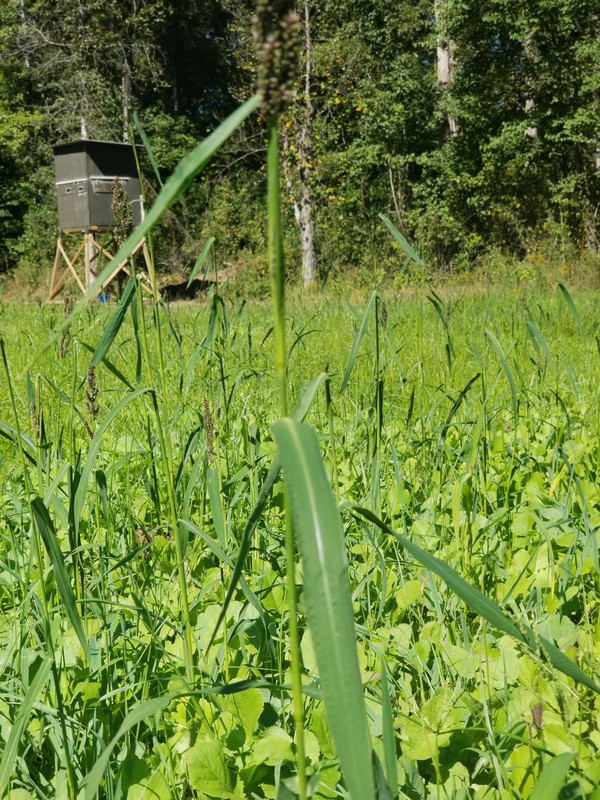
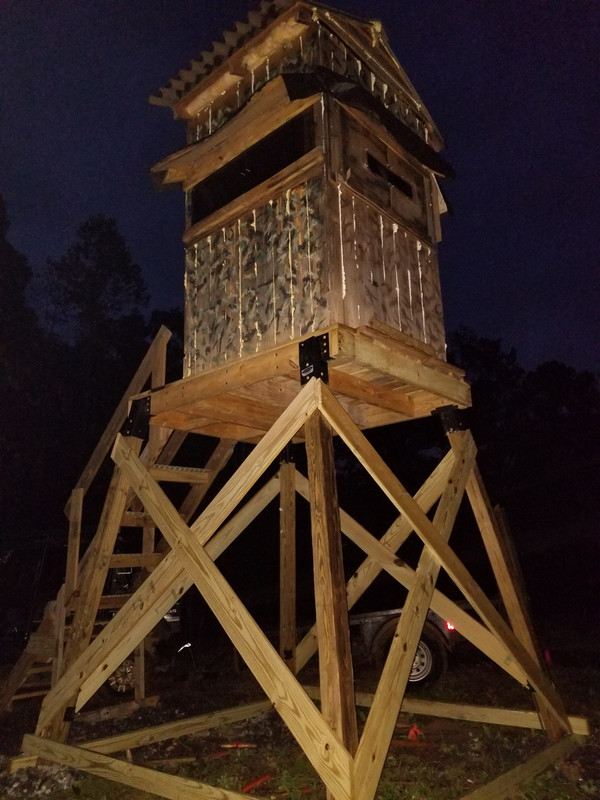
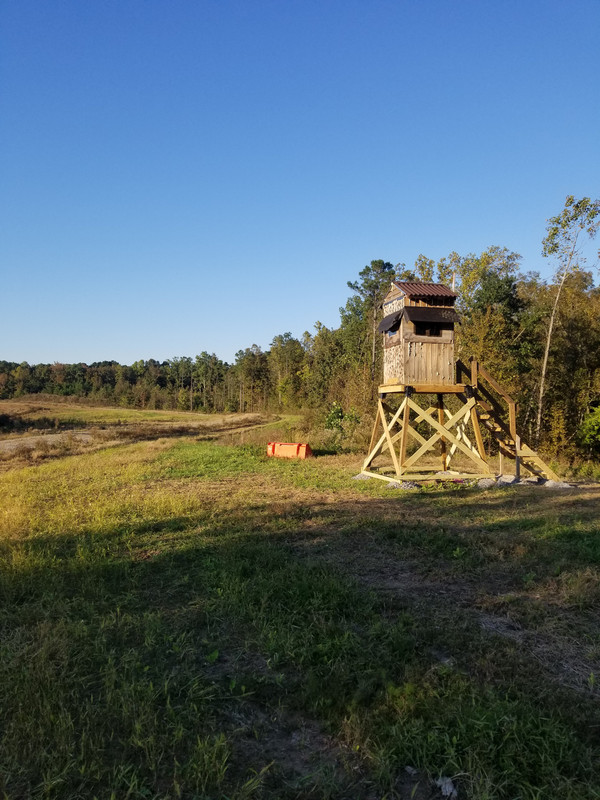
Just to add to the thread, I've built 2 stands with the brackets academy sports sells. One was a 4x4 with the actual house portion being built out scrap lumber integrated with my custom tittyflage camo pattern. The other is a big 6x6 I built this year. It's rooomy.
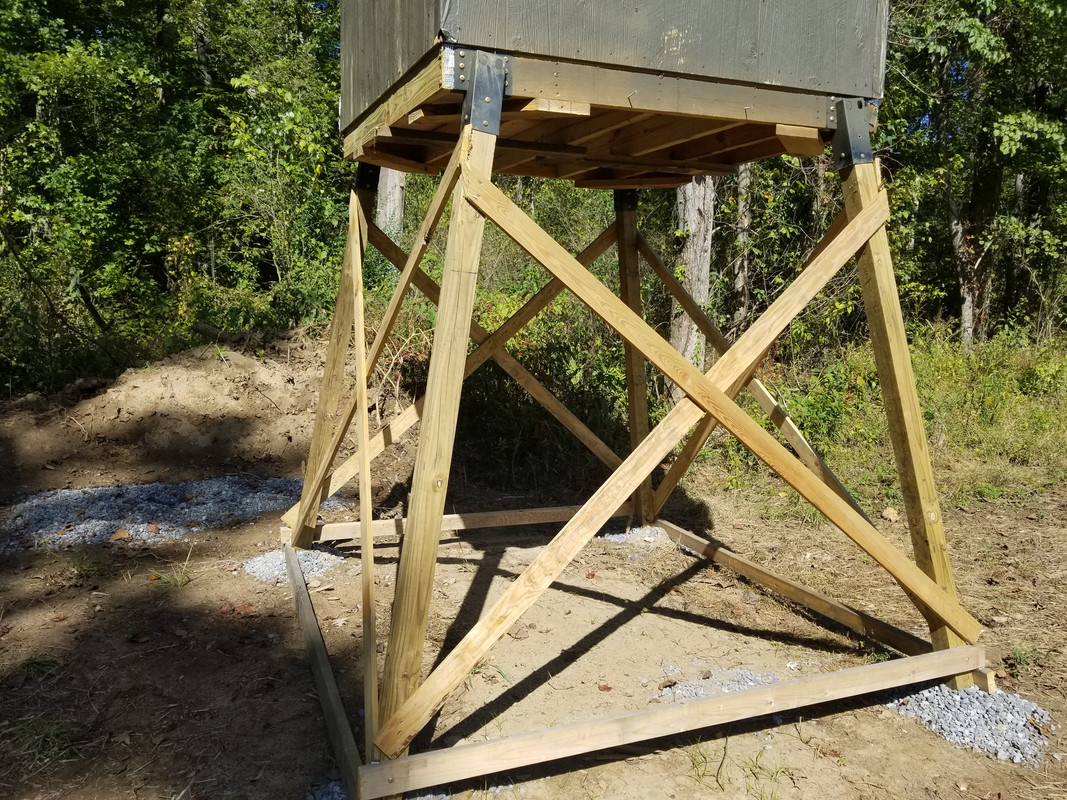
Those 2 pics above show the big 6x6. I dropped that bad boy like a boss trying to raise it by myself in the dark during a lightning storm using the tractor FEL...a stout toddy or two had been consumed. Once I fixed the house, I wound up just raising it with tractor forks and sticking the legs in and fastening to the brackets with lags and setting it back down and framing up the supports.
I anchored it with a coated 1/2" cable attached to the floor joists and then attached the cable and turnbuckle to a chain that is anchored in a 4 foot deep hole full of concrete situated directly under the stand. It works well.
I put steel mill gravel under all of the tower leg footings. The steel mill gravel sets up like concrete and prevents settling. That's a lot of weight concentrated in 4 small footprints to depend on no settling.
The last 2 are of a 4 1/2'x 4 1/2' stand I made 5 years ago out of scrap lumber and treated fence boards for the sides. It weighs alot. Zoom in on the 1st pic of this stand to see the highly effective tittyflage camo pattern. It makes you invisible to the deer.
I actually decided to build a platform for this one with the brackets and tower legs and support framing all attached and standing AND THEN set the stand on the platform and fastened it to the platform. That worked great. The wasps love the area under the platform.
I anchored it by welding up some brackets out of 1/4" stock two inch angle iron with thick-walled round tubing welded to the angle iron. I then drove 4 foot long rebar sections through each of the bracket's pipe and into the ground to anchor all 4 legs. I basically made the exact same anchor that the bracket manufacturer wanted me to order in the instruction manual.
I've been very pleased with mine. It's way better than augering 4 holes and getting them square and toting quikrete around, etc. I feel that not having to deal with all of that probably offsets the cost of the brackets. I think next year I'm going to weld up my own brackets now that I see how they are done.
One thing to add, like somebody else mentioned, if you go with tower brackets, walking the stand up and getting the legs to stick is dicey AF. I highly recommend either building a platform that you can walk up with pretty much any atv or manpower AND THEN build your stand on that platform, OR get somebody with a tractor and FEL with forks on the FEL to come out and actually lift the stand either onto the platform or lift it while the others install the 4x4 tower legs.
I'll never try walking a fully loaded tower stand up like that again. Frick that noise.
Posted on 3/2/19 at 10:13 pm to Bigbee Hills
Good suggestion and we took that into account.
We’re currently waiting on the windows to build the plywood walls. After we make the plywood walls and put windows in them we’re going to take the walls off the base. Then we’ll have 6 pieces - base, 4 walls, and a roof.
So the idea is to get the base up on the legs first, then put some bracing across the legs, then screw on the 4 walls and the roof. Then we’ll do stuff like adding shelves and hooks once the stand is set up and enclosed.
Posted on 3/3/19 at 2:28 pm to bapple
I see now that you said yall were building the base and tower first. I missed that. 
What windows are yall using? I call myself looking in the thread.
I've got a mix that I've personally tried, but my go-to is using 1/8 plexiglass cut in two, set into 1/4 aluminum plywood edge trim channel so that the two window sections slide in either direction on a "track" of sorts. It's cheap, easy, quiet and offers a lot of adjustability.
However, on a powerline stand I built this year where we have one direction to look, I put in one of those $30 single hung aluminum windows from lowes. I'll post a pic of it installed below.
I think that's the route I'm going to go from here on out on stands that have narrow lanes to watch. They're cheap and fairly quiet and keep bugs out.
One thing I'm doing to all my stands that are not wasp-tight is cutting out a small opening at the base of the house portion and putting in some type of sliding door contraption where I can more easily slide an insect fogger inside the house without opening the door. I hate wasps with a passion.
Heres the little lowes window installed. (I put in an improvised bench rest platform with sandbags so we could shoot benchrest targets or try to lope one in on a deer.)

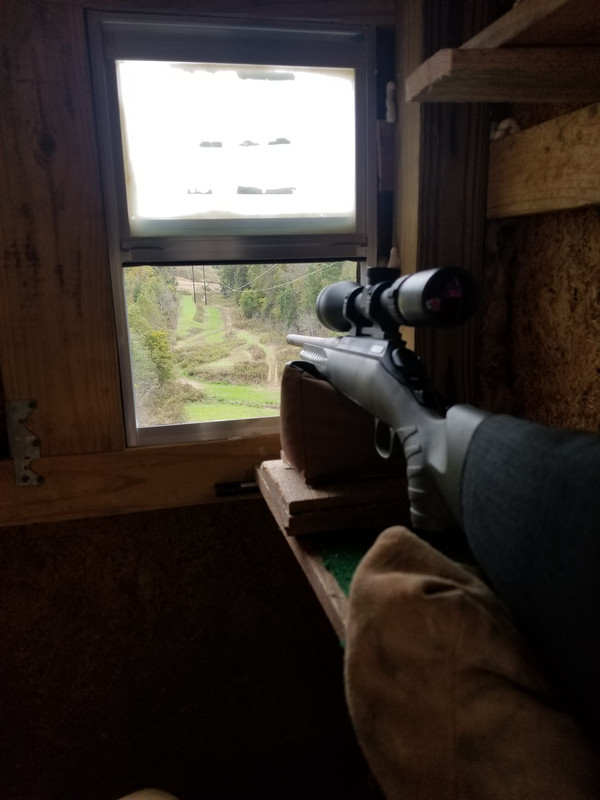
They're pretty darn good little windows for a deer stand.
What windows are yall using? I call myself looking in the thread.
I've got a mix that I've personally tried, but my go-to is using 1/8 plexiglass cut in two, set into 1/4 aluminum plywood edge trim channel so that the two window sections slide in either direction on a "track" of sorts. It's cheap, easy, quiet and offers a lot of adjustability.
However, on a powerline stand I built this year where we have one direction to look, I put in one of those $30 single hung aluminum windows from lowes. I'll post a pic of it installed below.
I think that's the route I'm going to go from here on out on stands that have narrow lanes to watch. They're cheap and fairly quiet and keep bugs out.
One thing I'm doing to all my stands that are not wasp-tight is cutting out a small opening at the base of the house portion and putting in some type of sliding door contraption where I can more easily slide an insect fogger inside the house without opening the door. I hate wasps with a passion.
Heres the little lowes window installed. (I put in an improvised bench rest platform with sandbags so we could shoot benchrest targets or try to lope one in on a deer.)
They're pretty darn good little windows for a deer stand.
Posted on 3/3/19 at 4:33 pm to Bigbee Hills
quote:
I see now that you said yall were building the base and tower first. I missed that.
Well I had originally thought to assemble it first and pick it up but I heard plenty of horror stories from friends who said the legs were very close to snapping
quote:
What windows are yall using?
Chat ordered some of these:
LINK
We ordered two 48x12 windows for the front and back, a 24x12 for one side, and 12x12 for the side with the door. We plan on caulking all the seams and putting spray insulation in the large gaps. Hopefully all of this together will keep bug populations to a minimum.
Posted on 3/6/19 at 12:46 am to bapple
I've heard nothing but good things about those. May order some next year when we add new shooting houses on our properties.
Posted on 4/1/19 at 7:52 am to Bigbee Hills
Update from this past weekend...
The turnaround time on the windows we purchased was about 3 weeks so it put our project on hold for a bit.
We got up two of the large walls and used some 2x2s for the framing to keep the weight down. We haven’t mounted the windows yet but it’s amazing how much viewing area there is with a 48” section. This stand is gonna be very nice.


EDIT: forgot to mention a couple things we’ve been debating.
1. What would be the best way to paint this thing? Rollers? Paint gun? Brushes?
2. I think my door design will be very simple and won’t go all the way to the roof since the roof will be at an angle. I’m thinking a simple 2x4 frame with a couple door hinges and a latch on the inside and outside would work best but I’m open to suggestions.
The turnaround time on the windows we purchased was about 3 weeks so it put our project on hold for a bit.
We got up two of the large walls and used some 2x2s for the framing to keep the weight down. We haven’t mounted the windows yet but it’s amazing how much viewing area there is with a 48” section. This stand is gonna be very nice.
EDIT: forgot to mention a couple things we’ve been debating.
1. What would be the best way to paint this thing? Rollers? Paint gun? Brushes?
2. I think my door design will be very simple and won’t go all the way to the roof since the roof will be at an angle. I’m thinking a simple 2x4 frame with a couple door hinges and a latch on the inside and outside would work best but I’m open to suggestions.
This post was edited on 4/1/19 at 7:58 am
Posted on 4/1/19 at 8:26 am to bapple
Roll it one solid color and get some spray paint that you can use to make random marks that will match the color of the foliage during hunting season
Posted on 4/1/19 at 8:35 am to bapple
Just roll it since you aren’t wanting a really smooth finish, also reccomended priming first to ensure good bonding since it’s exterior

 Page 4 of 4


Popular
Back to top