- My Forums
- Tiger Rant
- LSU Recruiting
- SEC Rant
- Saints Talk
- Pelicans Talk
- More Sports Board
- Fantasy Sports
- Golf Board
- Soccer Board
- O-T Lounge
- Tech Board
- Home/Garden Board
- Outdoor Board
- Health/Fitness Board
- Movie/TV Board
- Book Board
- Music Board
- Political Talk
- Money Talk
- Fark Board
- Gaming Board
- Travel Board
- Food/Drink Board
- Ticket Exchange
- TD Help Board
Customize My Forums- View All Forums
- Show Left Links
- Topic Sort Options
- Trending Topics
- Recent Topics
- Active Topics
Started By
Message
re: Garage Built Boat
Posted on 10/14/23 at 10:54 pm to DownshiftAndFloorIt
Posted on 10/14/23 at 10:54 pm to DownshiftAndFloorIt
If stepped or aerated hull it needs to be fwd of step (aka thru hull/shoot thru hull).
Haven’t seen many transom mount ducers read at speed on step/ventilated hulls, but I’m sure there are exceptions. Just need a spot with clean water.
Haven’t seen many transom mount ducers read at speed on step/ventilated hulls, but I’m sure there are exceptions. Just need a spot with clean water.
This post was edited on 10/14/23 at 10:55 pm
 1
1

Posted on 10/17/23 at 8:06 pm to CP3
Bailed out of work early today because I got burnt out from the last week and a half and it was just too pretty outside to be there. Decided I wanted to take the dog to the park and work on the boat.
Finished putting down what I’m calling the last seam filling epoxy. I mixed up some smaller batches than the 4oz batches I had been making. Watch I messed up the ratio on the last go and it doesn’t cure on me lol.
I also spent a couple hours and knocked out the wax fillet on the shear flange. Wasn’t really hard but was maybe a little more time consuming or tedious than I expected. Overal came out good.
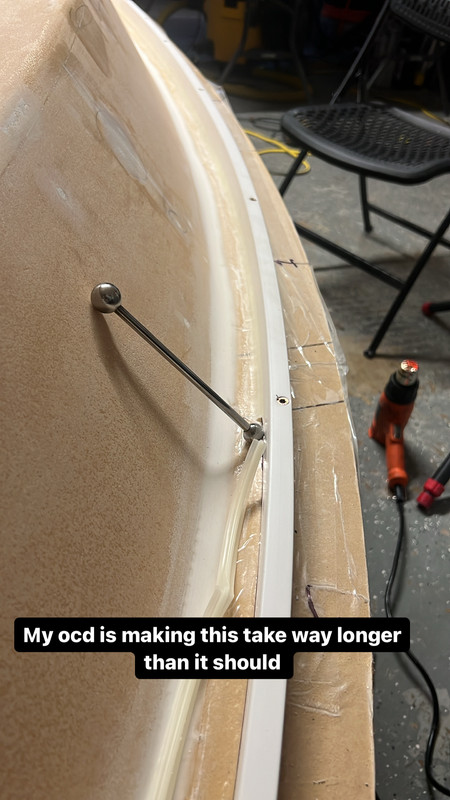
The anxiety of fiberglassing is looming overhead. Weather is shaping up nicely for glassing Saturday.
Finished putting down what I’m calling the last seam filling epoxy. I mixed up some smaller batches than the 4oz batches I had been making. Watch I messed up the ratio on the last go and it doesn’t cure on me lol.
I also spent a couple hours and knocked out the wax fillet on the shear flange. Wasn’t really hard but was maybe a little more time consuming or tedious than I expected. Overal came out good.
The anxiety of fiberglassing is looming overhead. Weather is shaping up nicely for glassing Saturday.
Posted on 10/21/23 at 6:51 pm to Timmayy
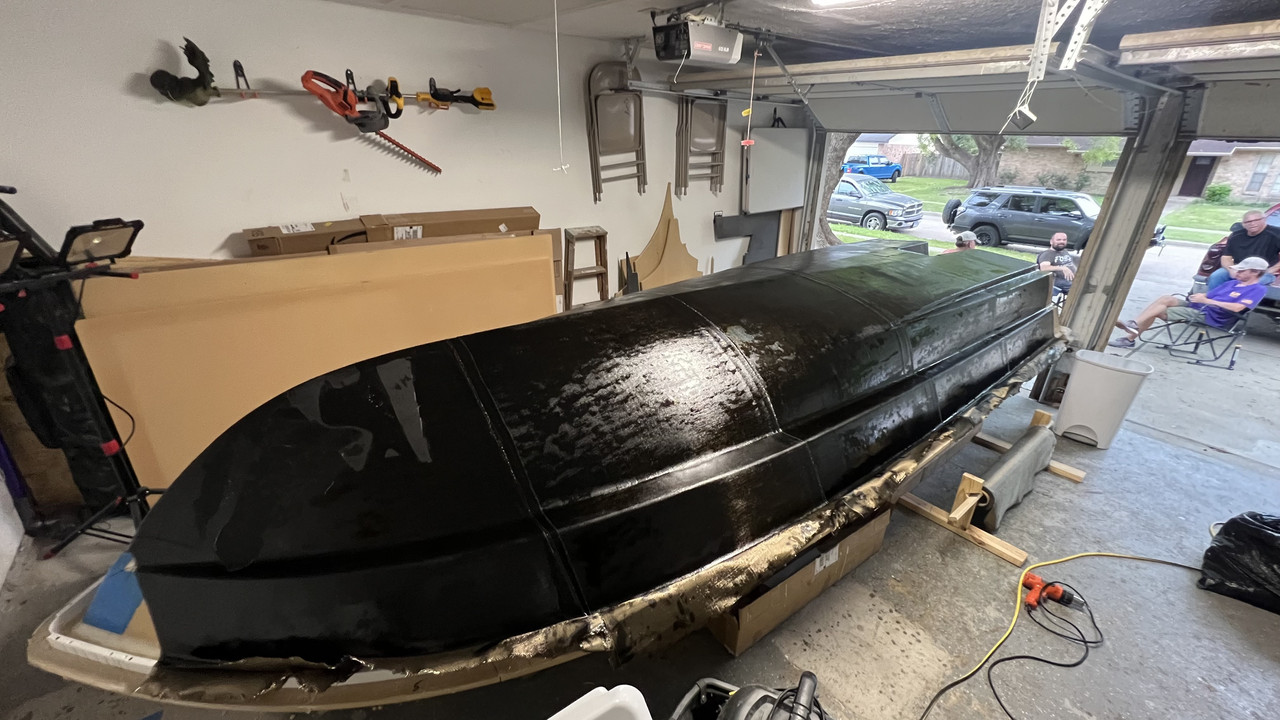
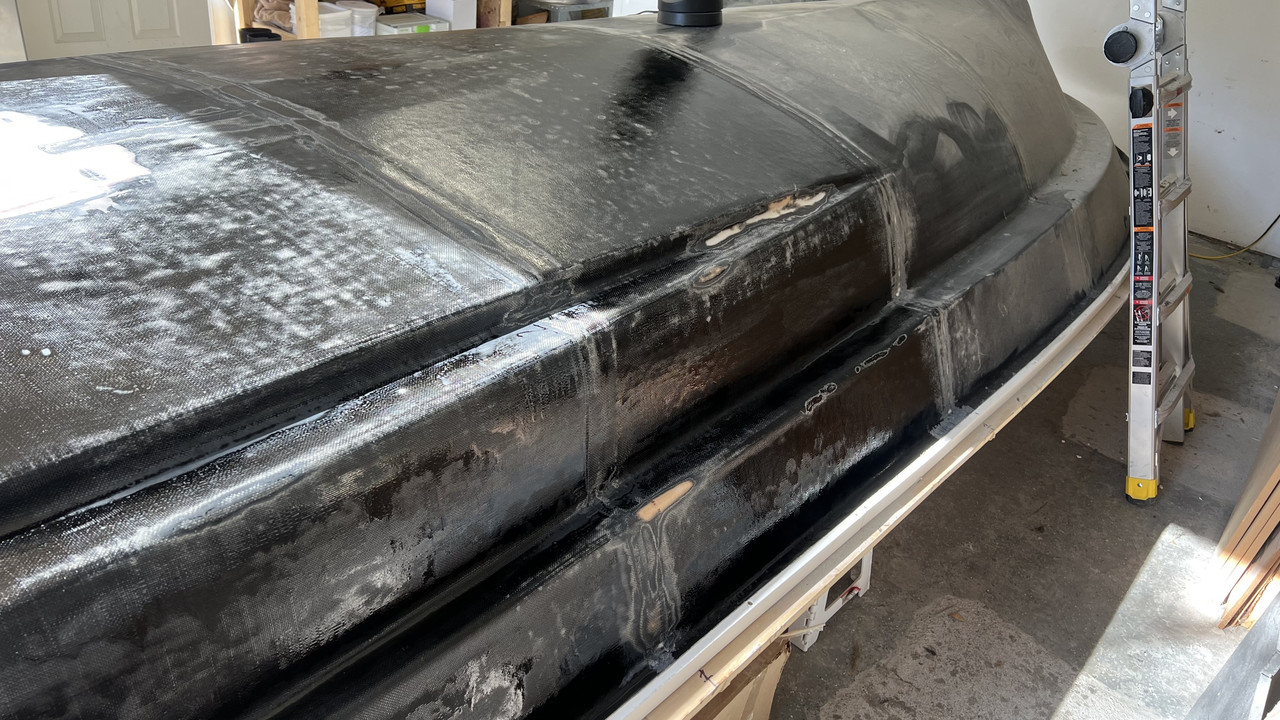
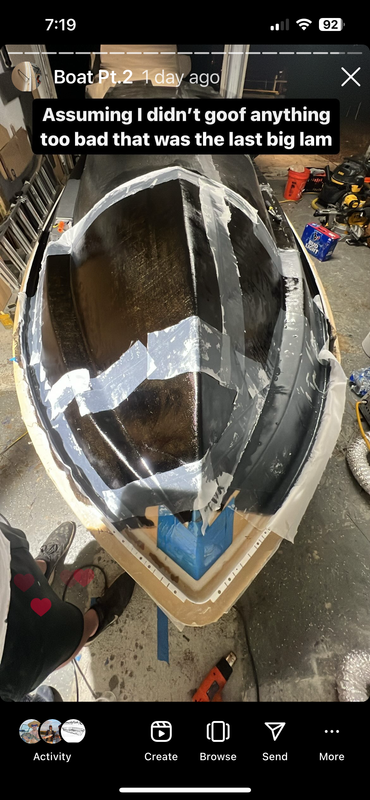
Today was the big day. I am very happy with the amount of work we knocked out and I cannot thank the guys that came to help purely just being nice people.
My family came in from Nola and we made a day out of it.
Defintiely learned a few things and a few things I would do differently but overall there’s very few things I feel I need to go back and do some rework to.
Got almost all 3 layers down should have cut the second bow piece a little differently and used some peel ply to keep the edges down si didn’t put the third layer there.
Some of the seems are a little taller than I would like so I will likely sand that out and reclassified there but maybe only one or two spots nothing major.
All in all very happy and again cannot thank everyone enough.
Posted on 10/21/23 at 7:01 pm to Timmayy
Looks great dude
Posted on 10/21/23 at 7:16 pm to Timmayy
Now we're getting somewhere!
Posted on 10/21/23 at 9:39 pm to Timmayy
Boom
Nice
Nice
Posted on 12/7/23 at 7:11 pm to reds on reds on reds
Baws it’s been a minute!!
Definitely slowed down since that glassing day, partly because I burnt out a bit, partly because I had anxiety thinking I messed everything up, partly because I was frustrated, and the rest because I didn’t know how to get myself back going.
So long story short after I glassed that day I went on searching for voids and grind them out to reglass. I knew I was going to have voids in my overlapped seams where I made the mistake of laminating the whole boat then coming back and doing the whole second layer then third. The problem with that was where the seams but together the frilly cut edges wanted to raise just a little. Which would have been fine had we laminated all three layers in a section at once and then moved forward since the next layer that went over the butted together seem would have pushed it back down and laid them flat. The problem lies in that we changed plans and by the time we laid the next layer over that seam it had hardened enough that the proud edge wouldn’t lay down. That ridge wasn’t not all over the seams. But in certain areas and in those areas it created a fiberglass void.
I knew this would be the case after the glassing day and told myself I would just grind out the voids and reglass the seam no big deal lesson learned.
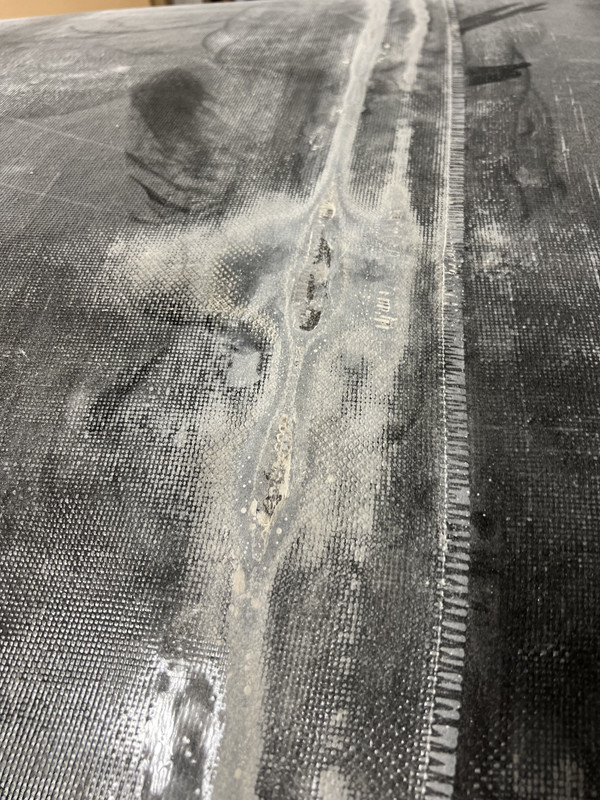
Well as I was grinding a void out of one of the inside radiuses that are pretty notorious for having voids and I got the wild hair to stick the chisel under the void and see how far I could go with it. I grabbed the piece I pried up and ripped it off from the layer underneath.
Seeing what I thought was completely dry glass immediately spiraled into panic that my entire layup was ruined and jumped to every conclusion in the book even to the point that I was going to have to grind everything offf and start over. I blamed that we squeegied to hard or rollered too hard or just plain didn’t wet it out enough.
Over the next few days I talked to a few people and ultimately ended up sending an email to the man himself Chris Morejohn. He pretty immediately emailed me back and said give me a call. I called him on Instagram since he doesn’t have a phone service in British Columbia and he first had me talk him through everything we did during our lamination. And then asked me to show him the areas where I was concerned.
Without really giving me any concrete answers he said I want you too lay up a few panels to test. Leave some really wet some squeezed pretty dry some layered all at the same time and some where laminations have about an hour and a half between layers. He said do that let those cure and give me another call.
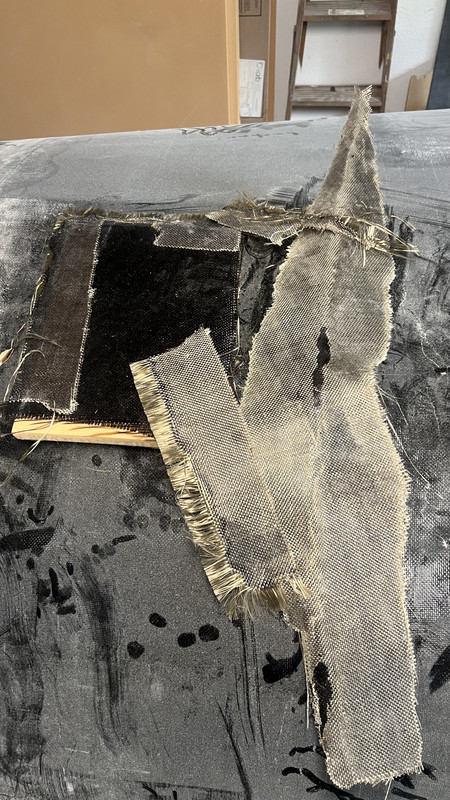
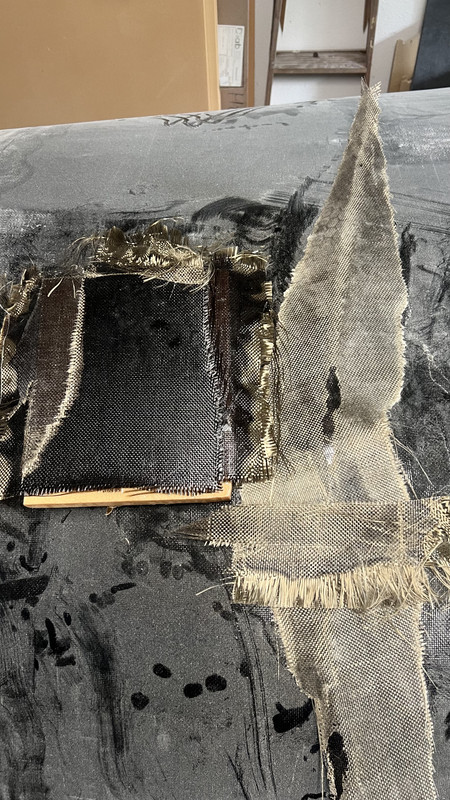
I did just that. I laid up test panels with every possible combo. Very wet really squeezed dry but still wet out. Some where I out both layers down at same time some where the first layered had kicked and was just tacky from the uncured resin.
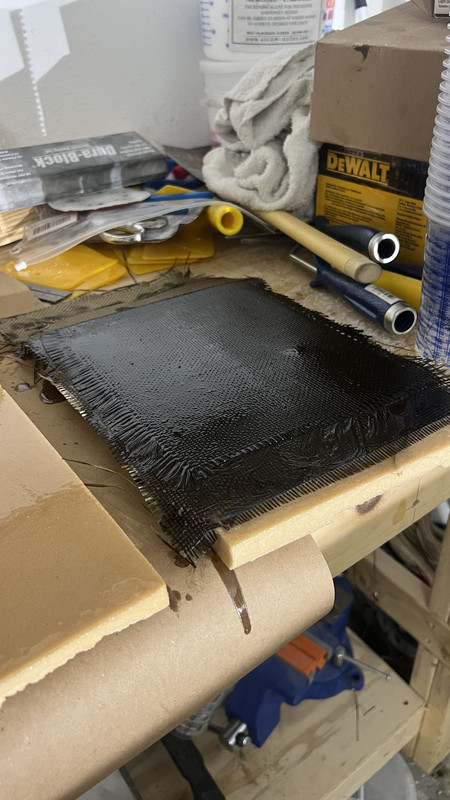

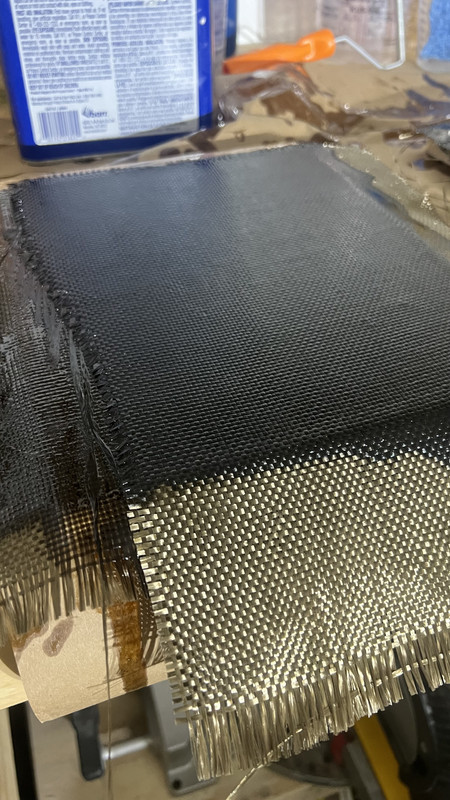
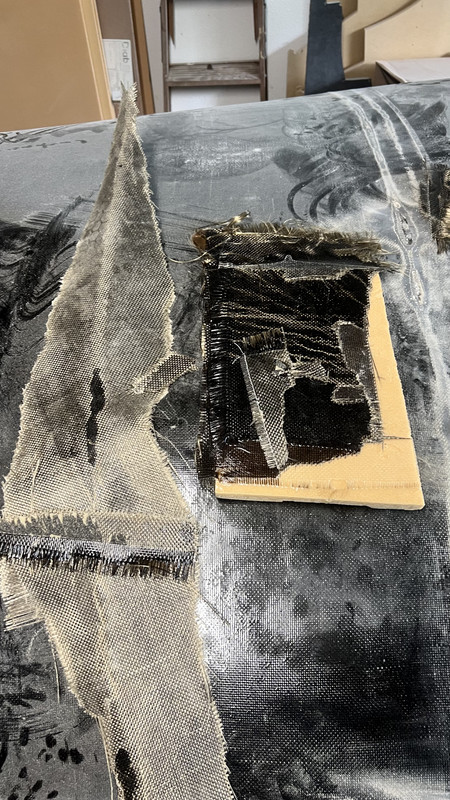
After everything cured up I gave him a call and we started testing. I had a few more panels not pictured but I really covered every mix match I could. I started grabbing layers and peeling them apart hitting them with hammers etc and to my ultimate relief every layer that I pulled off looked just like the one I had peeled off my boat. The glass came up looking completely dry. The only panel that put up and noticeable difference in fight was the oanel where everything was laid up wet in wet rather than wet on tacky. It’s not that its lamination couldn’t be pulled apart or that they didn’t look dry when they were pulled apart but there was better adhesion between the lamination.
After doing hammer tests and these peel tests Chris asked so what do you think.
I told him I no longer was worried that my lamination was an utter failure and that it seems to be normal that the glass will look dry after being peeled off.
He said he was glad I came to those conclusions and made me do all that so I could come to them myself. He didn’t want to just tell me something and I move on he wanted me to do it and feel good about it. He explained that fiberglass doesn’t really saturate in epoxy but becomes encapsulated in it. He said the first hint he had that I didn’t have a problem is that the resin was still tacky when I laid my next layers and that it wasn’t like I had just laid over amine blush if it had fully cured. The next hint was that my peeled lamination was leaving goosebump dimpling showing that there was actually epoxy on the bottom side.
He said the adhesion differences are not surprising and just the nature of the beast when it comes to primary and secondary bonds but that the failure method I was subjecting the lamination to is nothing it would ever see in use. Basically stop chiseling and peeling away my fiberglass lol.
After looking over my hull he was pretty happy with it and really wasn’t even recommending reglasskng the voids at the seams just cut the void out fill it with thickened epoxy and move on. Then he saw how much extra basalt I had imand changed his mind saying no reason not to put a fourth layer on the bottom running surface of the hull.
Since that weight was lifted from my shoulders I had kinda slowed from just the stress of it but also had some busy weekends. Also didn’t really know where to start back.
After a week or two I got over it and started trying to tackle the transom corners.
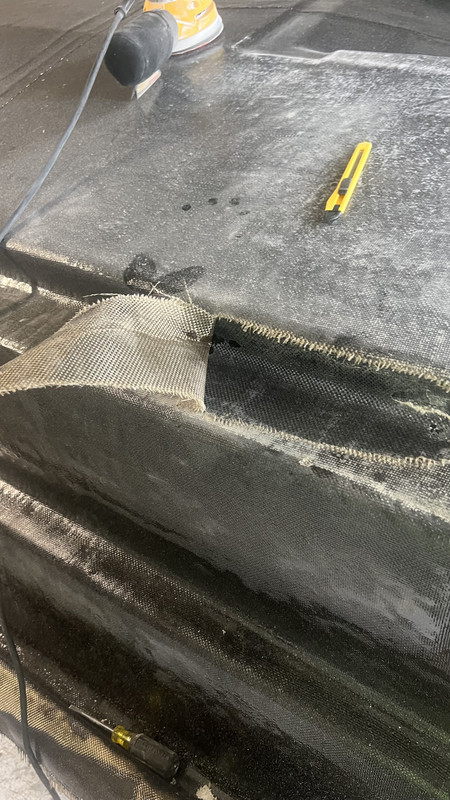
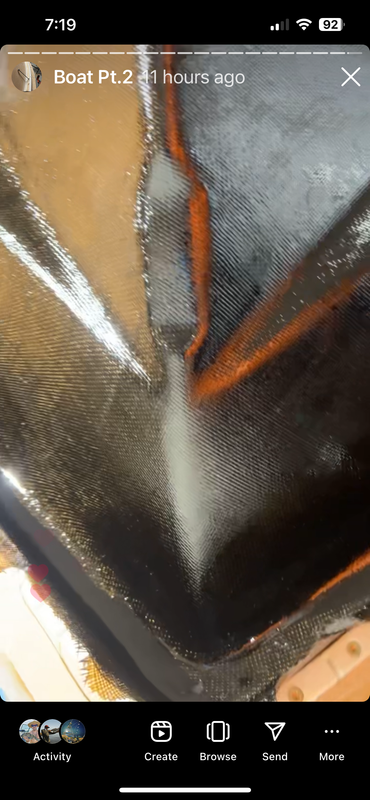
Ended up knocking them out by doing the corner in two seperate pieces rather than try to bend one piece around the corner. That means that the back edge has about an inch overlap on each side where the three layers interlace making a 6 layer seam. The peel ply worked beautifully to keep the edges down and I finally started laying some fiberglass that I didn’t have to go back and fix.

I started at the back so that I could get the tunnel glassed and finished up. I need to glass that vent overhang plate in but to do so I needed the tunnel to be faired out and primed since the plate will cover up a section that I will never be able to get to.
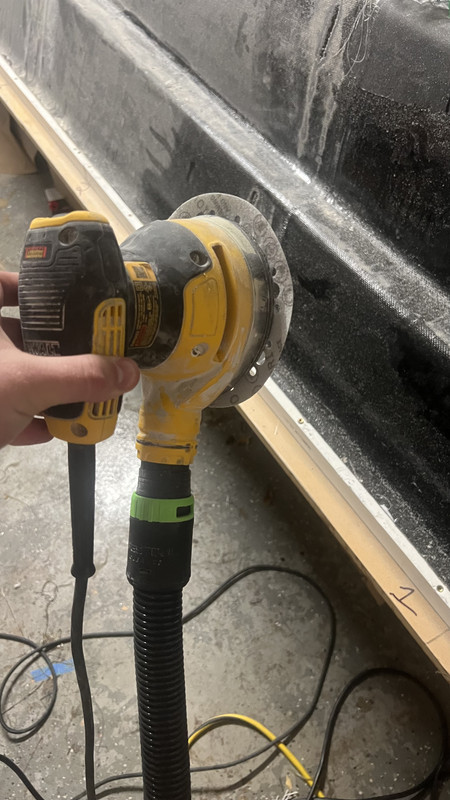
Right as I was doing this my wife surprised me and came through with a festool 150 rotex for my birthday/christmas and a great friend gifted me the festool dust extractor. Let me tell you they are unbelievable.

Also I saw this on an Instagram page where a guy out a 6” sanding disc on a 5” da orbital for protecting edges or making radiuses and it works amazing.
I’ll be better with updates from now on
Definitely slowed down since that glassing day, partly because I burnt out a bit, partly because I had anxiety thinking I messed everything up, partly because I was frustrated, and the rest because I didn’t know how to get myself back going.
So long story short after I glassed that day I went on searching for voids and grind them out to reglass. I knew I was going to have voids in my overlapped seams where I made the mistake of laminating the whole boat then coming back and doing the whole second layer then third. The problem with that was where the seams but together the frilly cut edges wanted to raise just a little. Which would have been fine had we laminated all three layers in a section at once and then moved forward since the next layer that went over the butted together seem would have pushed it back down and laid them flat. The problem lies in that we changed plans and by the time we laid the next layer over that seam it had hardened enough that the proud edge wouldn’t lay down. That ridge wasn’t not all over the seams. But in certain areas and in those areas it created a fiberglass void.
I knew this would be the case after the glassing day and told myself I would just grind out the voids and reglass the seam no big deal lesson learned.
Well as I was grinding a void out of one of the inside radiuses that are pretty notorious for having voids and I got the wild hair to stick the chisel under the void and see how far I could go with it. I grabbed the piece I pried up and ripped it off from the layer underneath.
Seeing what I thought was completely dry glass immediately spiraled into panic that my entire layup was ruined and jumped to every conclusion in the book even to the point that I was going to have to grind everything offf and start over. I blamed that we squeegied to hard or rollered too hard or just plain didn’t wet it out enough.
Over the next few days I talked to a few people and ultimately ended up sending an email to the man himself Chris Morejohn. He pretty immediately emailed me back and said give me a call. I called him on Instagram since he doesn’t have a phone service in British Columbia and he first had me talk him through everything we did during our lamination. And then asked me to show him the areas where I was concerned.
Without really giving me any concrete answers he said I want you too lay up a few panels to test. Leave some really wet some squeezed pretty dry some layered all at the same time and some where laminations have about an hour and a half between layers. He said do that let those cure and give me another call.
I did just that. I laid up test panels with every possible combo. Very wet really squeezed dry but still wet out. Some where I out both layers down at same time some where the first layered had kicked and was just tacky from the uncured resin.
After everything cured up I gave him a call and we started testing. I had a few more panels not pictured but I really covered every mix match I could. I started grabbing layers and peeling them apart hitting them with hammers etc and to my ultimate relief every layer that I pulled off looked just like the one I had peeled off my boat. The glass came up looking completely dry. The only panel that put up and noticeable difference in fight was the oanel where everything was laid up wet in wet rather than wet on tacky. It’s not that its lamination couldn’t be pulled apart or that they didn’t look dry when they were pulled apart but there was better adhesion between the lamination.
After doing hammer tests and these peel tests Chris asked so what do you think.
I told him I no longer was worried that my lamination was an utter failure and that it seems to be normal that the glass will look dry after being peeled off.
He said he was glad I came to those conclusions and made me do all that so I could come to them myself. He didn’t want to just tell me something and I move on he wanted me to do it and feel good about it. He explained that fiberglass doesn’t really saturate in epoxy but becomes encapsulated in it. He said the first hint he had that I didn’t have a problem is that the resin was still tacky when I laid my next layers and that it wasn’t like I had just laid over amine blush if it had fully cured. The next hint was that my peeled lamination was leaving goosebump dimpling showing that there was actually epoxy on the bottom side.
He said the adhesion differences are not surprising and just the nature of the beast when it comes to primary and secondary bonds but that the failure method I was subjecting the lamination to is nothing it would ever see in use. Basically stop chiseling and peeling away my fiberglass lol.
After looking over my hull he was pretty happy with it and really wasn’t even recommending reglasskng the voids at the seams just cut the void out fill it with thickened epoxy and move on. Then he saw how much extra basalt I had imand changed his mind saying no reason not to put a fourth layer on the bottom running surface of the hull.
Since that weight was lifted from my shoulders I had kinda slowed from just the stress of it but also had some busy weekends. Also didn’t really know where to start back.
After a week or two I got over it and started trying to tackle the transom corners.
Ended up knocking them out by doing the corner in two seperate pieces rather than try to bend one piece around the corner. That means that the back edge has about an inch overlap on each side where the three layers interlace making a 6 layer seam. The peel ply worked beautifully to keep the edges down and I finally started laying some fiberglass that I didn’t have to go back and fix.
I started at the back so that I could get the tunnel glassed and finished up. I need to glass that vent overhang plate in but to do so I needed the tunnel to be faired out and primed since the plate will cover up a section that I will never be able to get to.
Right as I was doing this my wife surprised me and came through with a festool 150 rotex for my birthday/christmas and a great friend gifted me the festool dust extractor. Let me tell you they are unbelievable.
Also I saw this on an Instagram page where a guy out a 6” sanding disc on a 5” da orbital for protecting edges or making radiuses and it works amazing.
I’ll be better with updates from now on
This post was edited on 12/7/23 at 7:51 pm
Posted on 12/7/23 at 7:36 pm to Timmayy
Oh no. Was thinking about this thread this past week.
Posted on 12/8/23 at 9:00 am to Timmayy
Wish you were closer, I would gladly help out.
Posted on 12/14/23 at 5:57 am to KemoSabe65
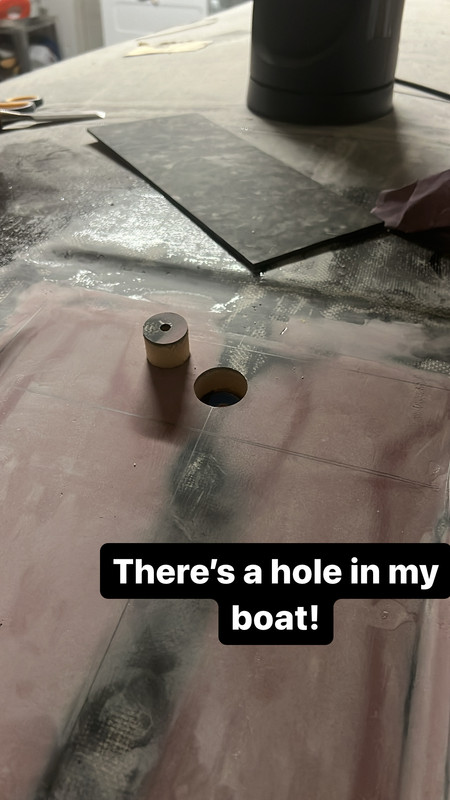
The tunnel is vented. I primed the area under the plate with a few coats to give a barrier since I won’t be able to get in there good later. Glued the plate down with cabosil. Somehow I managed to keep the inside seam clean. Without a bunch of excess pooching out but just enough to show that I had enough resin to get Coverage

Now I’ll just throw some fairing over the plate to get the running pad back to level. Then just continue moving from stern to bow putting some patches over ther voids I ground out and one more layer on the running surface with my extra basalt.
Now I’ll just throw some fairing over the plate to get the running pad back to level. Then just continue moving from stern to bow putting some patches over ther voids I ground out and one more layer on the running surface with my extra basalt.

Posted on 12/14/23 at 6:45 am to Timmayy
Awesome project and well done! 
Posted on 1/11/24 at 5:19 pm to Kato
Progress is slow mostly because I haven’t been making near as much time to work on the boat mostly because I don’t enjoy fiberhlassing as much as I enjoyed the “woodwork”.
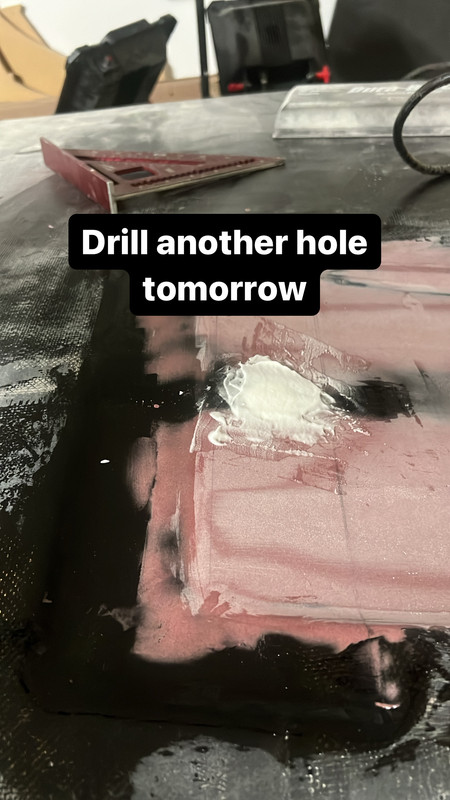
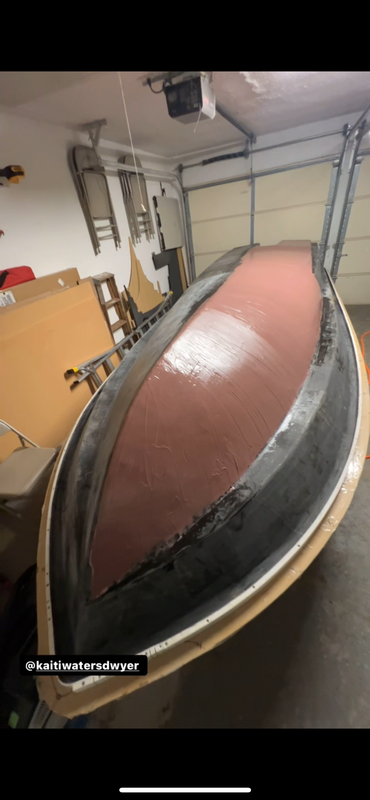
Since last update got that tunnel plate faired out which IMO came out perfect.

With that faired out it allowed me to move forward with the fiberglassing that is going to be twofold. One I need to fix all my newbie mess ups and two it lets me put to good use my leftover basalt.
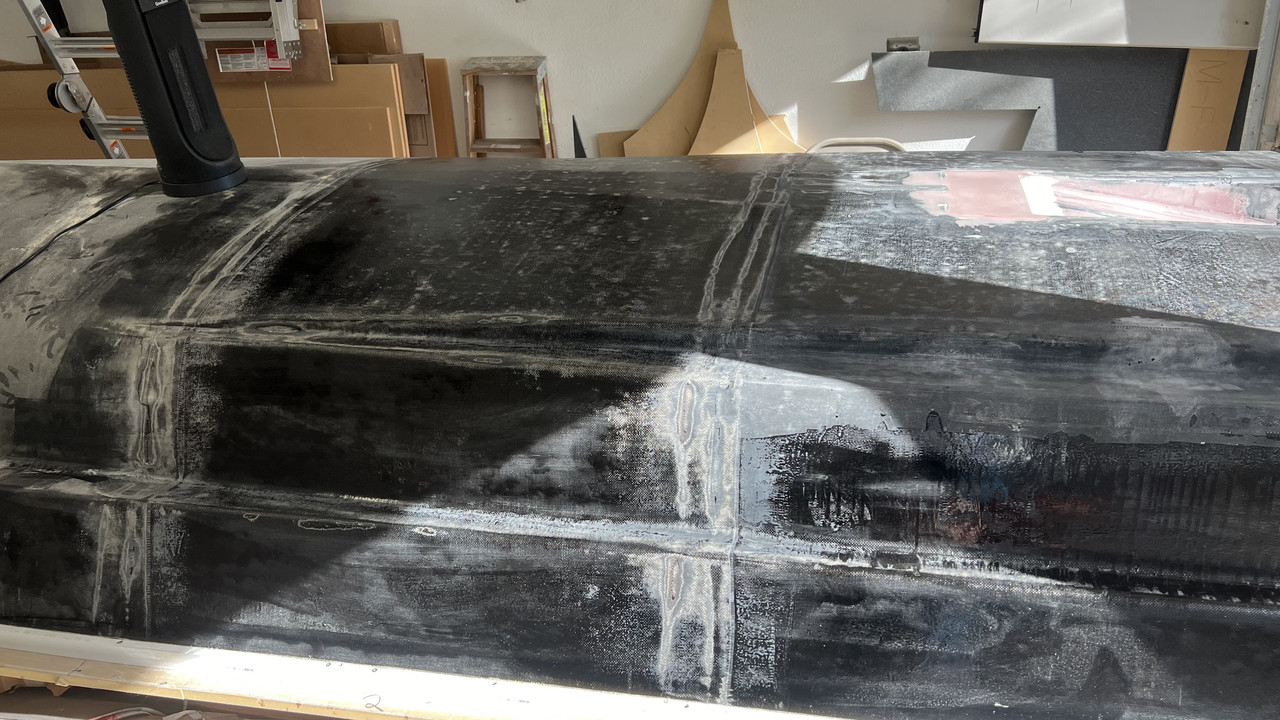
The fiberglass that I am putting on the bottom of the boat will be done in halves which is making it doable by myself but that also allows me to overlap the bottom pad to build up to more layers of glass in that are. It is also giving me a nice layer to tie in some of my repairs with.
I am doing this section by section so that I can be super anal about finding any voids and removing them. Every time I think I’m good I step away for a bit and come back with refreshed eyes until I don’t see any more issues. Doing that is obviously very eye opening but it’s relieving that I am very confident in my ability to find the voids and repairing them so far has seemed successful.
I use a chisel to tap around suspect areas and anywhere that is a void returns with a thunk rather than the ping of a solid layup. Once found I use the chisel to slice out the void then use my festool to sand a slope in the remaining lamination so that when I go to put glass down I can try to have the finished part as smooth as possible. This has been surprisingly more successful than I expected and the final finish isn’t showing the repair near as much as I originally expected and I have no concern about my ability to fair the remaining surface imperfections out.
At the end of the day I wish we would have done a few things differently with the original lamination but I’ve learned a ton and am finally getting back ti enjoying working on the boat.
Doing this last layer of glass wasn’t really thought necessary by Morejohn until he saw how much basalt I had left over and he said I might as well use it to build up the thickness on the running surface.
Once I got the smaller void filling glass patterns cut I sanded with 60grit the whole bottom surface by hand since the orbital only wanted to skim the high spots. Once I scuffed with 60 grit I felt good about the surface I was laminating to vacuumed and acetone wiped multiple times and put some neat epoxy down to get tacky then started my lamination up.


Last nights lamination had me blaring creed in the garage until midnight tho….
Wil just keep working my way forward only doing full sheets to the upper spray rail. I would say I’ve got most of the harder stuff behind me.
Since last update got that tunnel plate faired out which IMO came out perfect.
With that faired out it allowed me to move forward with the fiberglassing that is going to be twofold. One I need to fix all my newbie mess ups and two it lets me put to good use my leftover basalt.
The fiberglass that I am putting on the bottom of the boat will be done in halves which is making it doable by myself but that also allows me to overlap the bottom pad to build up to more layers of glass in that are. It is also giving me a nice layer to tie in some of my repairs with.
I am doing this section by section so that I can be super anal about finding any voids and removing them. Every time I think I’m good I step away for a bit and come back with refreshed eyes until I don’t see any more issues. Doing that is obviously very eye opening but it’s relieving that I am very confident in my ability to find the voids and repairing them so far has seemed successful.
I use a chisel to tap around suspect areas and anywhere that is a void returns with a thunk rather than the ping of a solid layup. Once found I use the chisel to slice out the void then use my festool to sand a slope in the remaining lamination so that when I go to put glass down I can try to have the finished part as smooth as possible. This has been surprisingly more successful than I expected and the final finish isn’t showing the repair near as much as I originally expected and I have no concern about my ability to fair the remaining surface imperfections out.
At the end of the day I wish we would have done a few things differently with the original lamination but I’ve learned a ton and am finally getting back ti enjoying working on the boat.
Doing this last layer of glass wasn’t really thought necessary by Morejohn until he saw how much basalt I had left over and he said I might as well use it to build up the thickness on the running surface.
Once I got the smaller void filling glass patterns cut I sanded with 60grit the whole bottom surface by hand since the orbital only wanted to skim the high spots. Once I scuffed with 60 grit I felt good about the surface I was laminating to vacuumed and acetone wiped multiple times and put some neat epoxy down to get tacky then started my lamination up.
Last nights lamination had me blaring creed in the garage until midnight tho….
Wil just keep working my way forward only doing full sheets to the upper spray rail. I would say I’ve got most of the harder stuff behind me.
Posted on 1/11/24 at 6:22 pm to Timmayy
Can I ask a question which may be a dumb one:
Why is the tunnel “vented”?
And it looks really great.
Why is the tunnel “vented”?
And it looks really great.
This post was edited on 1/11/24 at 6:22 pm
Posted on 1/11/24 at 7:22 pm to bbvdd
Most simple answer is that it breaks the vacuum that the tunnel would create when running. It’s supposed to help your hole shot and top end a bit. Only downside is it can introduce a little more cavitation.
Posted on 3/12/24 at 7:22 am to Timmayy
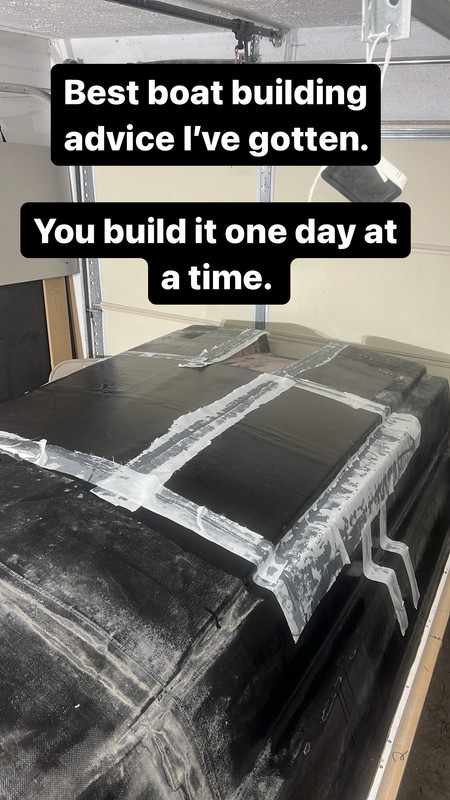
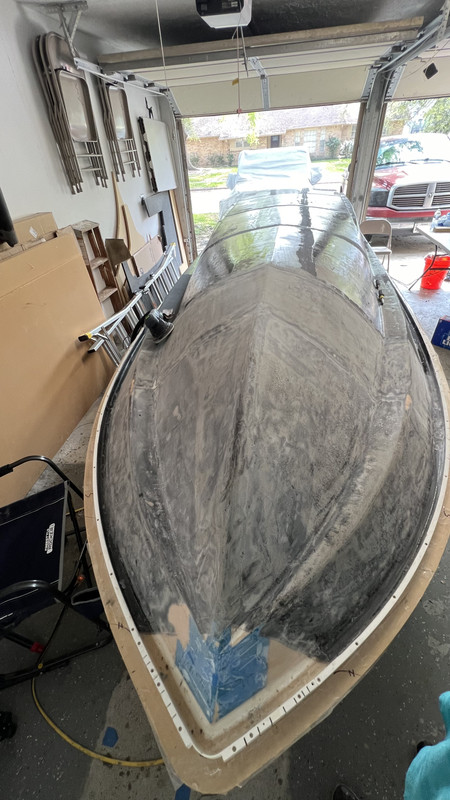
On to fairing!

Posted on 3/12/24 at 8:01 am to Timmayy
Go Timmayy go!
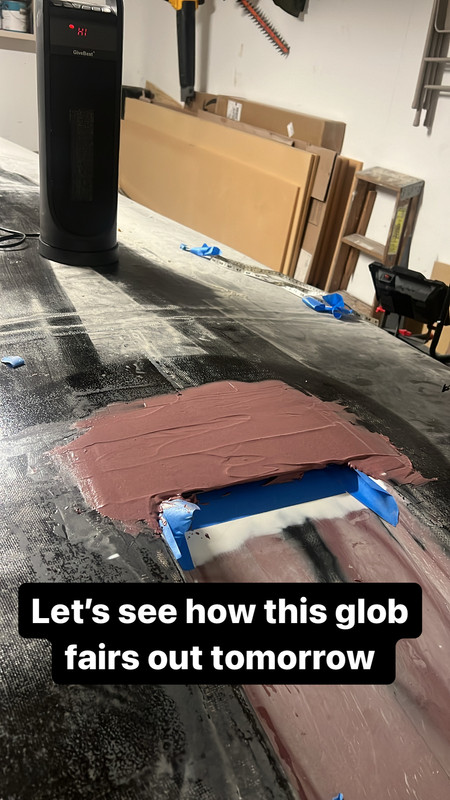
Posted on 4/7/24 at 10:03 pm to Saskwatch
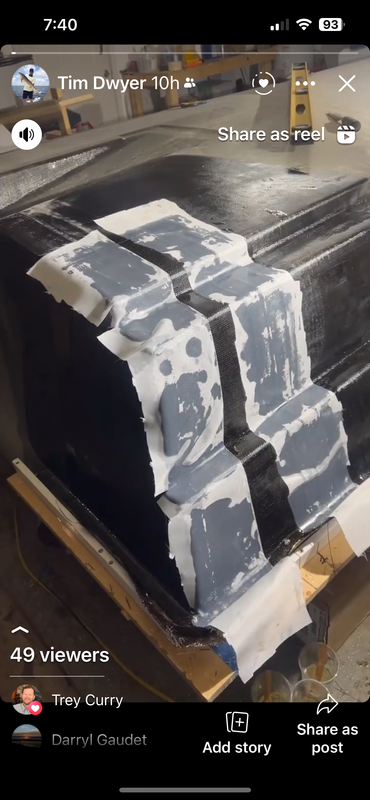
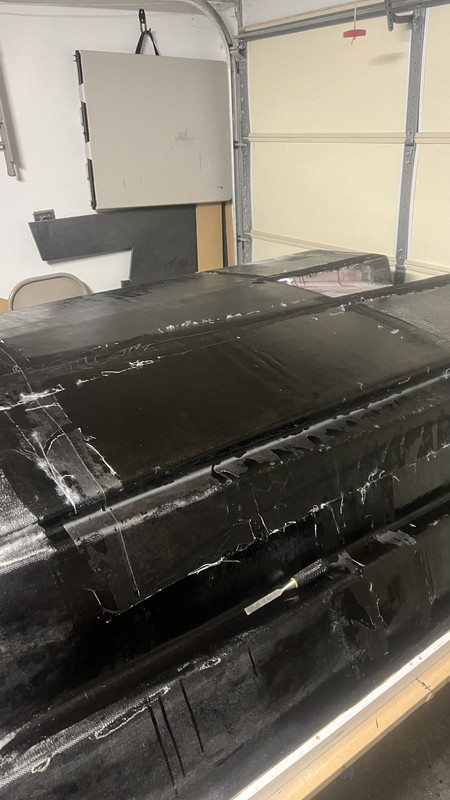
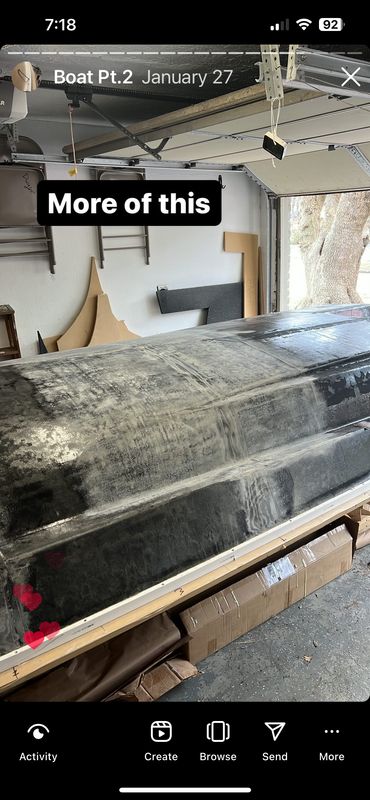
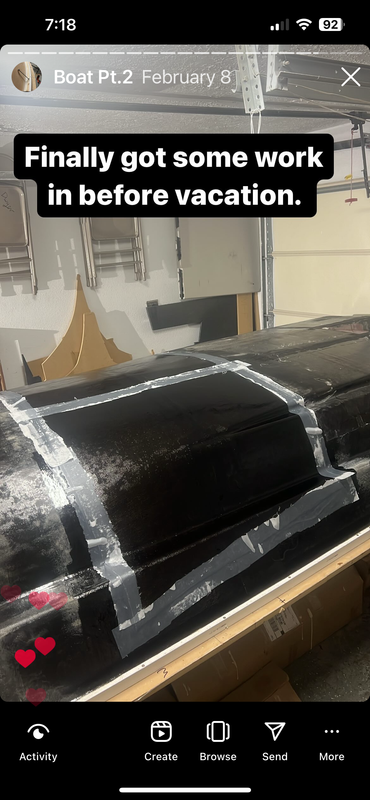
Keep chugging along. Spent probably 8 hours to max and spread what you see here. I should get to work on her a bit this weekend so hope to be sanding by next week.
Posted on 4/8/24 at 7:10 am to Timmayy
How are you keeping the dust out of your home? Garage has to be full of glass dust with all of that sanding. Looking great
Posted on 4/8/24 at 8:56 am to KemoSabe65
I will now and forever recommend dust collection systems. I’ve always thought it wasn’t worth the money but my god it is amazing how well it works.
I have a small festool dust collection vacuum that I initially used for hooking up the the festool rotax150 rotary/da sander but after being blown away with how much dust it sucks up I make sure to use it for everything.
I hook the hose up for my dewalt 5” orbital but also free hand the hose whenever I’m using the finger file.
My wife would kill me if the whole garage was covered in fiberglass dust.
Posted on 4/8/24 at 9:51 am to Timmayy
I used a shop last Feb to glass gunnels on Kenner and the amount of dust was crazy. Tell me you are wearing an N95 or better respirator.
Can't wait to see a motor hanging on the transom.
Can't wait to see a motor hanging on the transom.

 Page 9 of 11

Popular
Back to top