- My Forums
- Tiger Rant
- LSU Recruiting
- SEC Rant
- Saints Talk
- Pelicans Talk
- More Sports Board
- Fantasy Sports
- Golf Board
- Soccer Board
- O-T Lounge
- Tech Board
- Home/Garden Board
- Outdoor Board
- Health/Fitness Board
- Movie/TV Board
- Book Board
- Music Board
- Political Talk
- Money Talk
- Fark Board
- Gaming Board
- Travel Board
- Food/Drink Board
- Ticket Exchange
- TD Help Board
Customize My Forums- View All Forums
- Show Left Links
- Topic Sort Options
- Trending Topics
- Recent Topics
- Active Topics
Started By
Message
re: Post your Woodworking Projects
Posted on 5/1/19 at 10:26 am to TIGERBAIT84

Posted on 5/1/19 at 10:26 am to TIGERBAIT84

k now you're just showing off
That looks damn good! I'd love to learn how to do inlays like that. What's a good resource? I have a 1/4" bit router.
 2
2

Posted on 5/1/19 at 11:59 am to idlewatcher
While i don't know how HE did it, I'll tell you you can easily do this with your router. Not with a 1/4" bit though. You'll need either a 1/16" bit for the very edge along the state borders, or you can make a stencil since it's so big and use an inlay kit with a 1/8" bit. But even then there would be tough spots to do. Personally I'd take the time and have some patience and use the 1/16" bit and just freehand it. You don't have to be anywhere near perfect doing it on a cypress log. Just be close.
Cut out the states outline from 1/8" thick stock with a scroll saw or even with your routers 1/8" bit. Then lay it with double sided tape onto the slab and trace it out with an exacto knife to score the slab. Use the 1/16" bit to rout up to the line you scored into the slab. Hog out everything in the middle with a bigger bit. Due to the size you may need to make another base for your router, but this is simple.
For the river you use your 1/4" bit and rout out the recess, then fill with epoxy made for this type of application.
If you have a router and spend a few bucks on some bits you can do this much easier than you think.
Now... here's the trick. You need that slab of cypress to be as perfectly flat as possible. Once you have that, you're golden!
This post was edited on 5/1/19 at 12:00 pm
Posted on 5/1/19 at 1:14 pm to deuceiswild
I couldn’t have said it better.
Flat slab. If not you’ll fight the epoxy and you will lose.
Dry slab. If not your epoxy will forever remain tacky.
For the stencils I have a secret that I’m willing to share this one time only.... Hobby Lobby ;).
Slide a piece of take under it. Trace it. Take the smallest possible bit and set at 1/4-1/2 inch depth. Slowly route your outline. Put in a larger bit at the same depth and finish it out.
For the one above I let it cure (the blue) then drew the river with a sharpie. I routed out the river and repoured it with the brown.
Posted on 5/1/19 at 1:33 pm to idlewatcher
If you like the inlay theme he’s a few more with some others mixed in.
If you would like some other pointers and or a free lesson/beer I’m always game for that also.


If you would like some other pointers and or a free lesson/beer I’m always game for that also.
Posted on 5/1/19 at 1:42 pm to TIGERBAIT84
It came out really nice. I've never used epoxy before but inlays are pretty much all i do. It keeps me busy. When i did the fleur de lis posted on the previous page of this thread i considered trying epoxy for the outline but i chickened out since i had never used it before.
The tiger eye i made would look really nice if done with a metallic gold epoxy i believe. But if i were gonna use epoxy for that I'd totally remake the stencil and sharpen some corners and points rather than sand them down as i did in the one pictured.
What brand do you use?
The tiger eye i made would look really nice if done with a metallic gold epoxy i believe. But if i were gonna use epoxy for that I'd totally remake the stencil and sharpen some corners and points rather than sand them down as i did in the one pictured.
What brand do you use?
Posted on 5/1/19 at 1:50 pm to Drunken Crawfish
Here are a few I built, Some are refurbs of yard sale shite. Haven't built anything in a few years, but I need to get back at it! Great stuff in this thread, a lot of talented folks on this board!
Table for my mom's beach house

Couple of benches

Side table for my dad:

The last three here are junk pieces that I cleaned up:


I have a bunch of others but this is all I have saved
Table for my mom's beach house
Couple of benches
Side table for my dad:
The last three here are junk pieces that I cleaned up:
I have a bunch of others but this is all I have saved
Posted on 5/1/19 at 6:41 pm to idlewatcher
I think I’d just been looking at the badass table saw the other dude just got and mindlessly typed that. lol
Yeah, miter. Miter saw.
But, a table saw is next on my list. Then, a decent router. Might buy a cheap router to practice with and move up in class over time.
Yeah, miter. Miter saw.
But, a table saw is next on my list. Then, a decent router. Might buy a cheap router to practice with and move up in class over time.

Posted on 5/1/19 at 6:44 pm to BRgetthenet
Pawn shops seem to be a dumping ground for some decent routers. I just picked up a very clean Bosch 2.25 HP fixed base.
Posted on 5/1/19 at 8:18 pm to Drunken Crawfish
Few recent builds
 [/img]
 [/img]
 [/img]
 [/img]
[/img] [/img] [/img] [/img]Posted on 5/1/19 at 9:21 pm to deuceiswild
I use Chill Epoxy from Polymeres_Technologies on larger high end pieces. I’ll use casting resin from homedepot or Lowe’s for everyday things. Black diamond pigments are by far the best I’ve found for tinting.

Posted on 5/2/19 at 7:26 am to TIGERBAIT84
Any of y’all ever build a budget wood headboard? Don’t need anything crazy complicated just want something better than all this veneer coated BS I see for sale online
Also, if using common pine, is it important to use conditioner before staining? I see that mentioned in here and got me wondering
Also, if using common pine, is it important to use conditioner before staining? I see that mentioned in here and got me wondering
This post was edited on 5/2/19 at 7:57 am
Posted on 5/2/19 at 7:29 am to TIGERBAIT84
Planned out a couple hundred sqf of 100+ year old quarter sawed pine flooring yesterday.
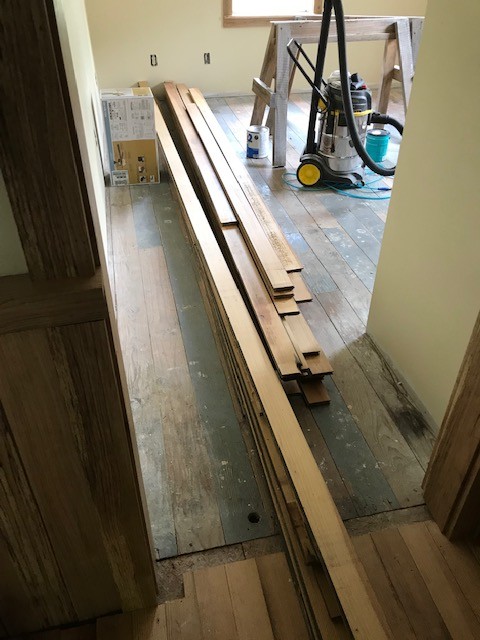
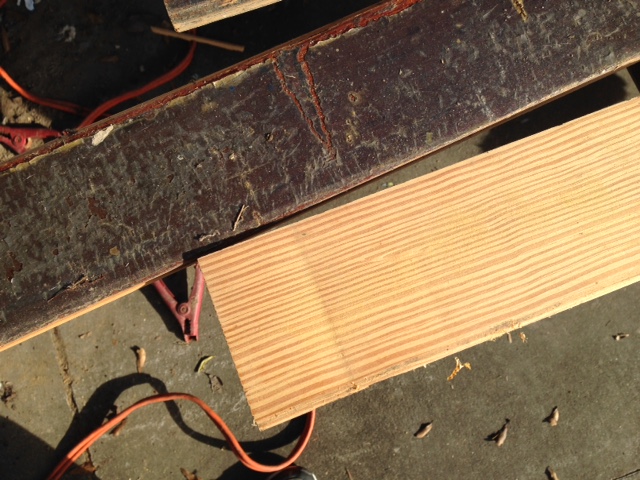
Looks like this once installed.
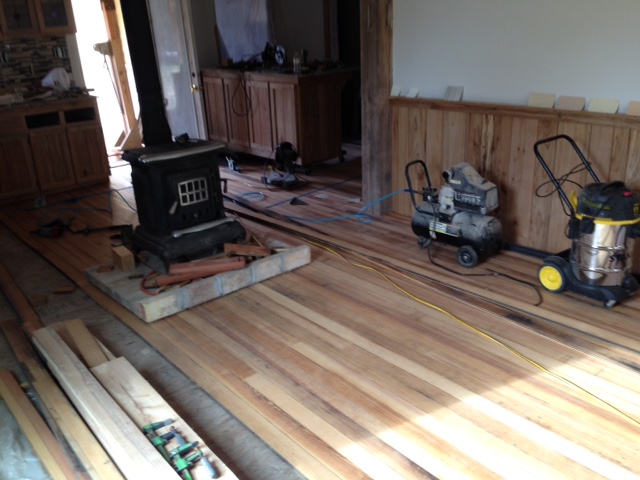
Looks like this once installed.
Posted on 5/2/19 at 8:11 am to PapaPogey
quote:
Any of y’all ever build a budget wood headboard? Don’t need anything crazy complicated just want something better than all this veneer coated BS I see for sale online Also, if using common pine, is it important to use conditioner before staining? I see that mentioned in here and got me wondering
Yes, use a conditioner. You can heavily thin shellac with denatured alcohol (thin 50/50 or more).
Here is one I made out of an old door and newel post from an old house
[
 [/img]
 Here is a wall mounted headboard out of reclaimed cypress for a platform bed (finish is looking rough, it’s about 10 years old at that point and has since been freshened up)
 [/img]
  [/img]
 Posted on 5/2/19 at 9:55 am to Drunken Crawfish
Ring box I made to propose to my fiancé, Easter weekend
 [/img]
[/img]Posted on 5/2/19 at 10:04 am to PapaPogey
I took this coffee table:

Built a frame and added a French cleat. It made a great headboard.


Built a frame and added a French cleat. It made a great headboard.
Posted on 5/2/19 at 10:13 am to fullstrut
Fullstrut wins this thread
Posted on 5/2/19 at 10:13 am to TIGERBAIT84
Very nice! What are the woods on the chess board? Those dark squares look phenomenal.
Posted on 5/2/19 at 10:33 am to Drunken Crawfish
I built this corner light for my Little Man's changing area:

He really likes looking at it and all the shadows it makes. Here's a link to the process: Light build process
He really likes looking at it and all the shadows it makes. Here's a link to the process: Light build process
Posted on 5/2/19 at 10:46 am to Drunken Crawfish
Sinker Cypress kitchen
 [/img]
Few doors and transits
 [/img]
 [/img]
 [/img]
[/img] Few doors and transits
[/img] [/img] [/img] Posted on 5/2/19 at 10:51 am to TIGERBAIT84
quote:
deuceiswild
Appreciate the insight brother. I should've specified that my router accommodates 1/4" collets to be more precise. I'm definitely going to give this a whirl when I get some free time.
quote:
TIGERBAIT84
Are you a master woodworker? Very impressive (and creative) craftsmanship. How did you get the epoxy T in Tigers not to bleed into the L in LSU? It's nuances like that which I need to learn.

 Page 5 of 17

Popular
Back to top