- My Forums
- Tiger Rant
- LSU Recruiting
- SEC Rant
- Saints Talk
- Pelicans Talk
- More Sports Board
- Fantasy Sports
- Golf Board
- Soccer Board
- O-T Lounge
- Tech Board
- Home/Garden Board
- Outdoor Board
- Health/Fitness Board
- Movie/TV Board
- Book Board
- Music Board
- Political Talk
- Money Talk
- Fark Board
- Gaming Board
- Travel Board
- Food/Drink Board
- Ticket Exchange
- TD Help Board
Customize My Forums- View All Forums
- Show Left Links
- Topic Sort Options
- Trending Topics
- Recent Topics
- Active Topics
Started By
Message
AR-15 for dummies.
Posted on 8/9/21 at 3:49 pm
Posted on 8/9/21 at 3:49 pm
So I have several bolt action rifles and shotguns for hunting, as well as pistols for self-defense and plinking, is there anyone who could post some links (or even just explain it flat out to me) as far as “building an AR for dummies”? From what I can deduce, the “lower” is the trigger and stock, and the “upper” is the barrel and what ever comes along with that? Would I need a gunsmith to assemble it for me, assuming I have no knowledge other than cleaning a gun? Thanks in advance.
 12
12


Posted on 8/9/21 at 3:53 pm to Dave_O
Youtube is your friend.
Posted on 8/9/21 at 3:57 pm to Dave_O
You basically just need a vise and some jigs to hold the receivers. And an armorers wrench.
I built the lowers in my living room with the wrench and some punches. No Vice required.
The uppers need a crap ton of torque to tighten the barrel on so you will need a vise for that portion at least. But you can buy full uppers and have them shipped straight to your door if you don’t want to hassle with it.
ETA: it’s very easy and I recommend building your own. Watch lots of videos. It’ll be a great skill to have and it’s very fun. Knowing exactly what’s in the firearm and how it all works is never a bad thing. Especially when diagnosing what may be wrong if it ever malfunctions.
This post was edited on 8/9/21 at 3:59 pm

Posted on 8/9/21 at 4:24 pm to Dave_O

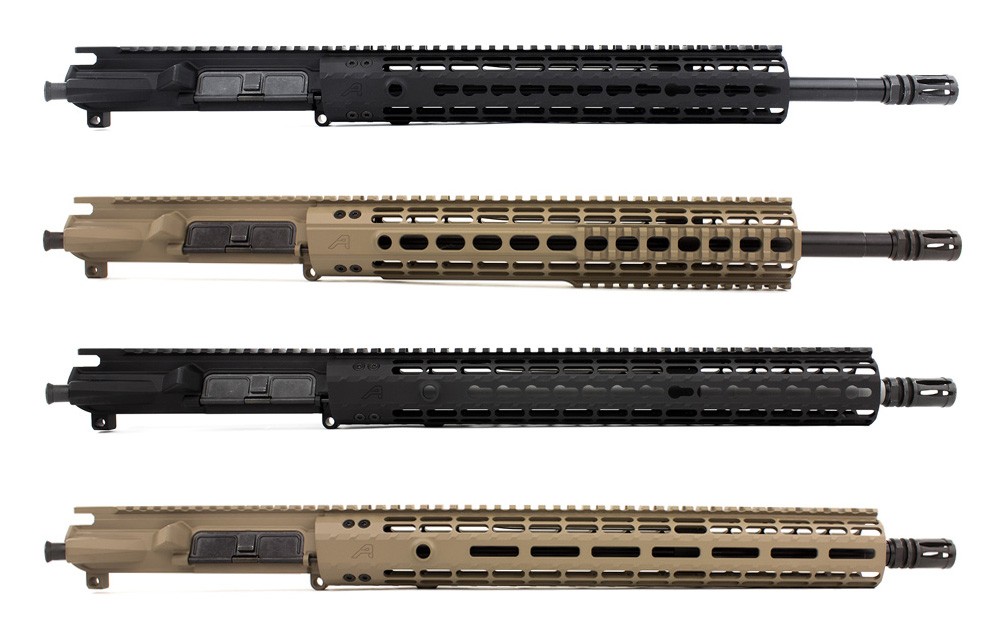
If you look at the parts lists in that photo, #1 on the right side is the upper receiver and #2 on the left side is the lower receiver.
The two receiver halves line up together and join with two push pins.
So to answer your question about the difficulty in assembling a gun, it depends on how finished the upper/lower is.
With a complete upper, such as:
And a complete lower, such as:
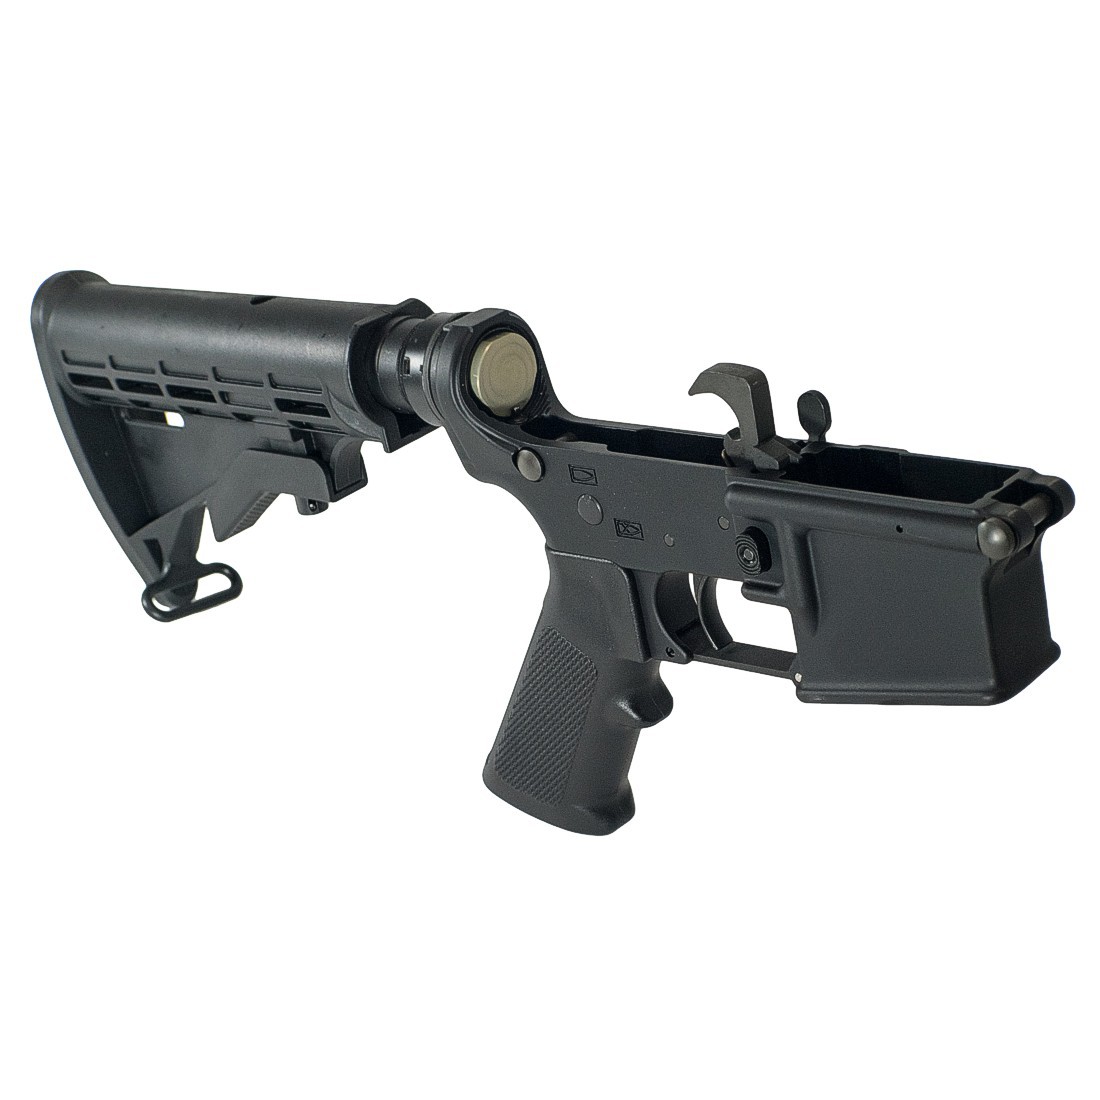
You just line up the two pins, push them closed and you're done.
Turning a stripped lower such as:
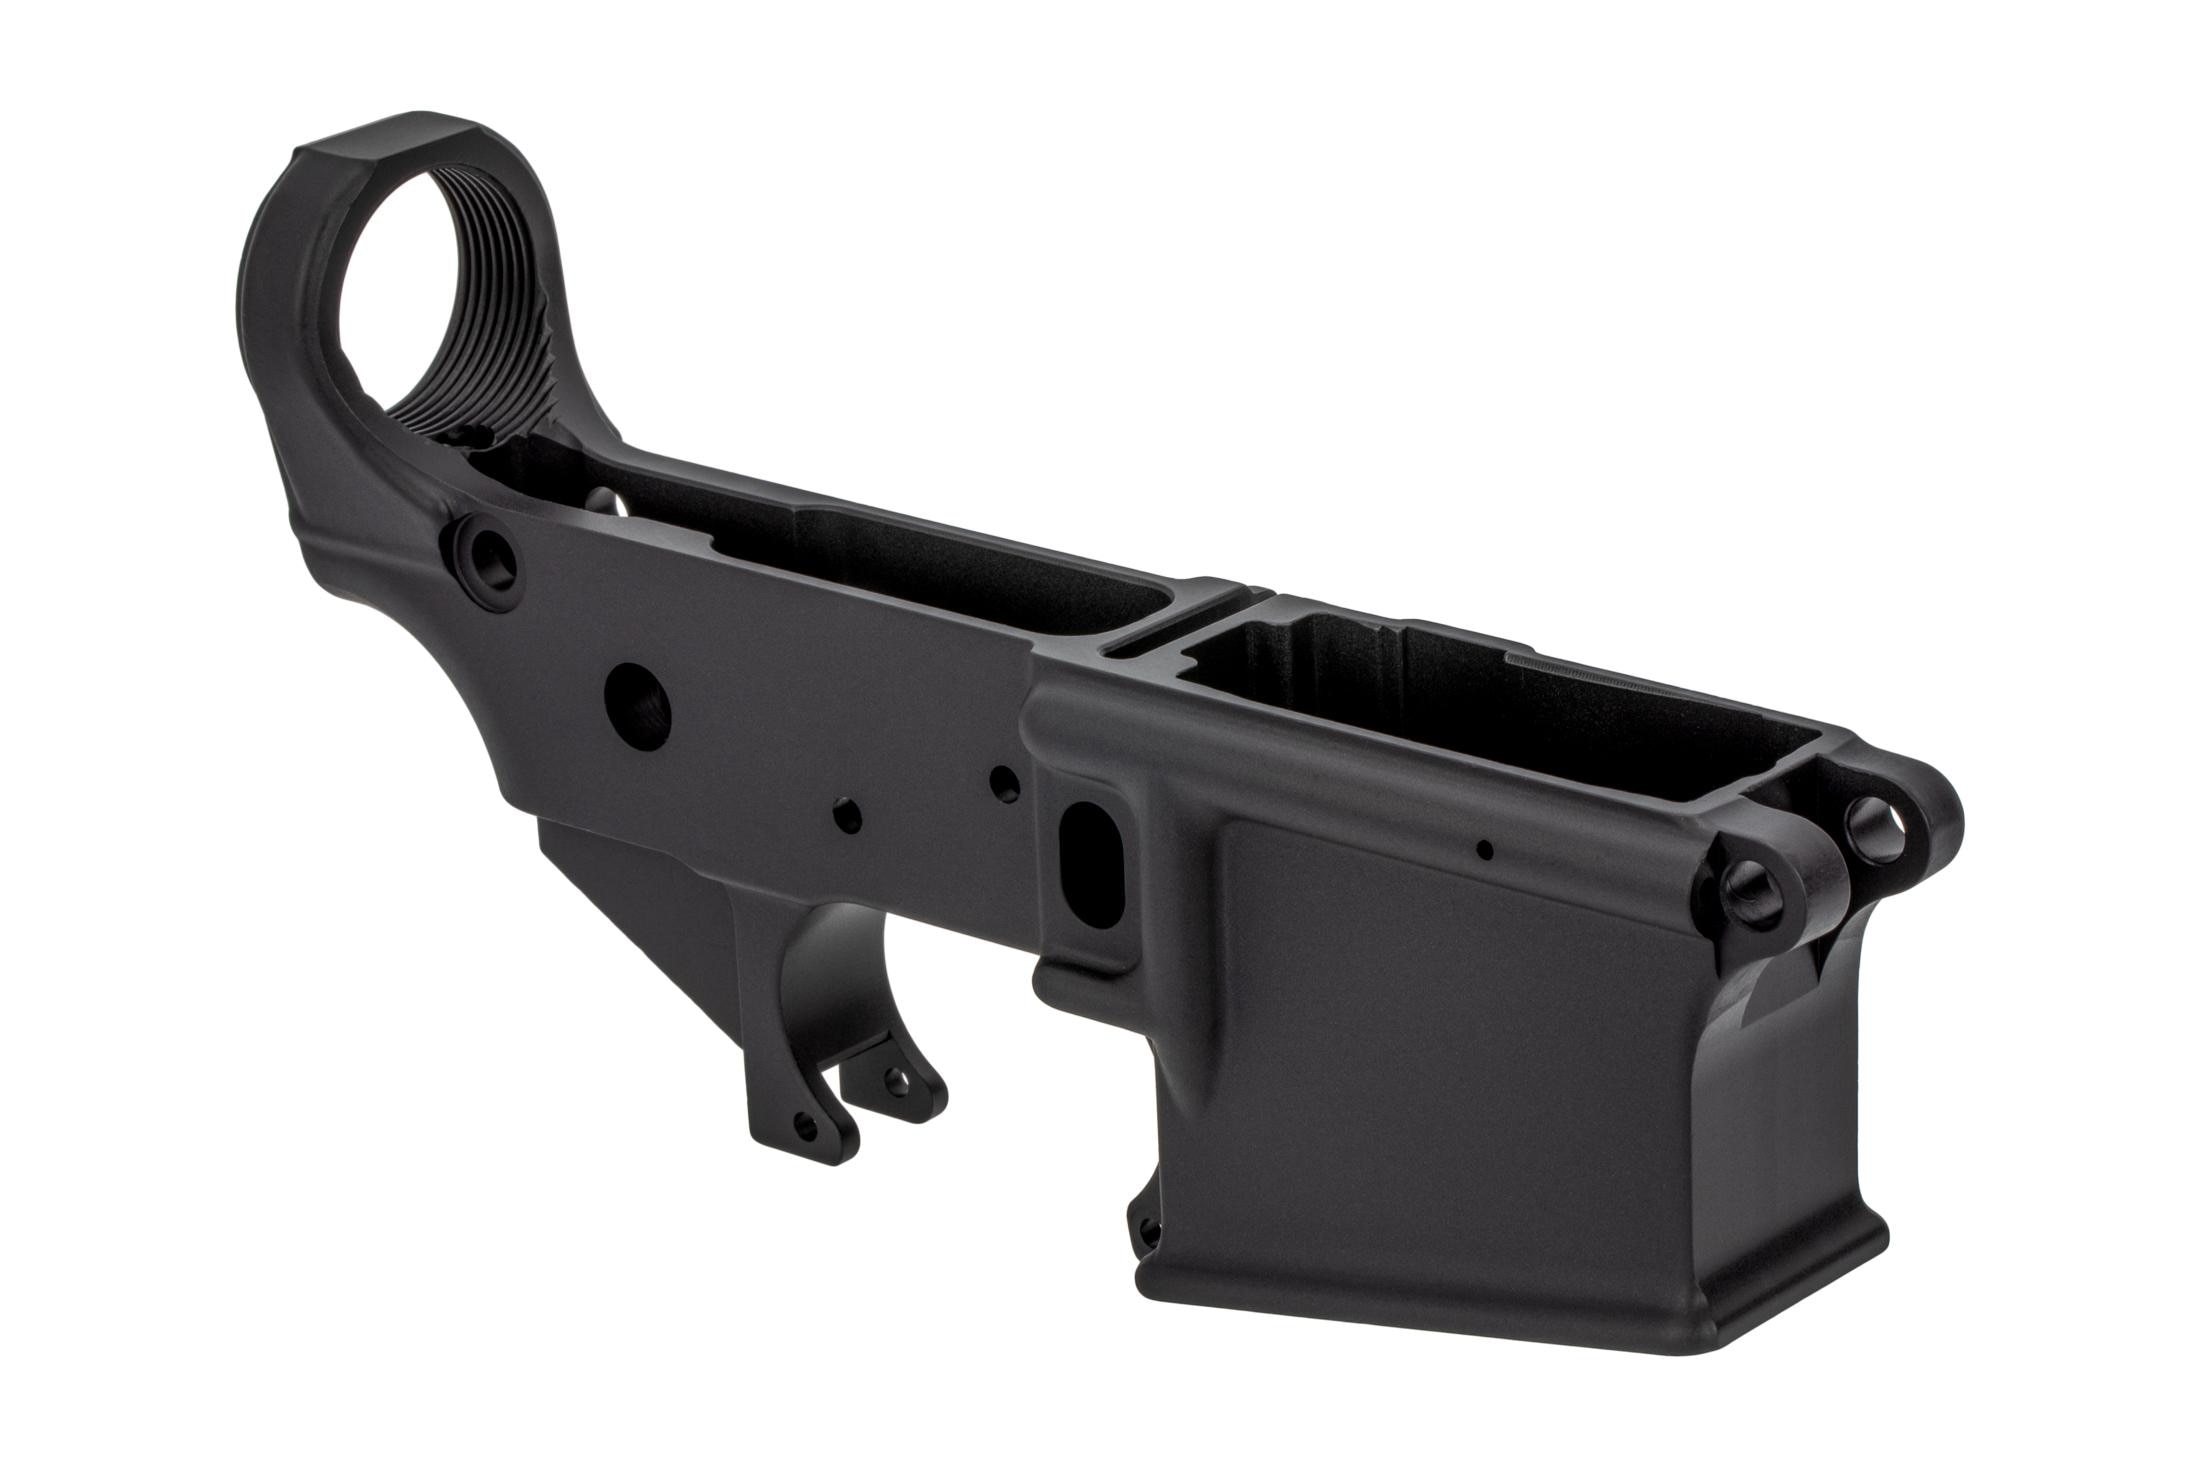
into a complete lower is relatively simple but does require more tools and planning. Same goes for turning a stripped upper into a complete upper.

Note that when buying parts from retailers, the "gun" that requires a background check is the stripped lower. Whether it's a complete rifle, a complete lower, or a stripped lower, if it has the lower receiver with holes in it for a fire control group it's "a gun" whereas everything else (i.e. complete uppers) are just parts and can be shipped to your house.
This post was edited on 8/9/21 at 4:27 pm
Posted on 8/9/21 at 4:25 pm to Dave_O
The lower receiver is the part that houses the trigger assembly, safety, accepts the magazine, and accepts the buffer tube and grip. It also carries the weapon's serial number and must be transferred to you by a FFL holder. The only part that has to be transferred is literally the receiver itself. Everything that goes in or attaches to the lower receiver can be shipped to your front door and can be assembled with a couple of punches, though there are a couple of parts (the retention and pivot pin assembly, specifically) that could use a specialty tool. That tool is a 1/4" clevis pin and should cost you about a buck at the hardware store. A vise would also be nice to be able to hold the receiver steady while assembling.
The upper receiver accepts the barrel, gas system, bolt carrier group and charging handle, the dust cover over the ejection port, and the forward assist, if you have one. The barrel and possibly handguard will require some grunt to get them installed and WILL require a vise to hold the upper, an armorer's wrench to turn the barrel nut, and a torque wrench to attach to the armorer's wrench that you can dial in and input the grunt into the barrel nut. It wants more than 30 ft-lb, but less than 80 or so, and the torque wrench is a decent idea to get it into the range. You tighten to 30 ft-lb, unscrew, tighten again, unscrew again, then torque to your final torque in 5 ft-lb increments. The rest of the stuff in the upper can be put together with hand tools and punches.
It is by no means impossible to mount a barrel at home, it's just that it requires a dedicated bench, vise, space to turn a torque wrench, etc. It's generally a good idea to mount a reaction rod or a vise jig to transmit the torque to the vise without passing it through the body of the receiver to keep from twisting it, and that's another specialty tool you'll need to mount a barrel. Since it takes so much more room and tools to mount a barrel, I generally just opt for completed uppers and put the rest together myself. The completed upper generally comes with everything mounted, but with no bolt carrier assembly or charging handle. I recommend that if you're interested in building, you mount at least one barrel yourself just so you know how. If you're not interested in learning how to build one up, you could just buy a complete rifle instead.
Of note is that if you buy a complete rifle, you pay the 11% (I think) federal excise tax that gets applied to completed rifles. Taxable items contain a lock/action, stock, and barrel. This tax is paid one time and paying this tax is the responsibility of the maker of the item the first time the title to the item changes hands after it is created. So, the cost of the 11% tax is built into the sale price, so you never really see it as a line item. But it's there, passed on from maker to distributor to FFL to you. The maker of a rifle and the manufacturer (might not be the EXACT terms used by Treasury and these terms might not mean the same thing when the ATF/DOJ uses them that it does when Treasury uses them) are not necessarily the same thing for tax purposes, however. The manufacturer is the entity that manufactures the parts, but the maker is the entity that makes the firearm and produces a taxable item from those parts. When you buy all the parts from the manufacturer and assemble it, you are the maker of the firearm and are responsible for paying the excise tax upon transfer, not the company that manufactures the parts. So, when you buy the parts, you are not buying a rifle and the vendor just tacks on the normal sales tax on the cost.
Since the excise tax must be paid on business use, if the taxable item is used for personal use it is exempt from the excise tax. On a $1000 rifle, that's about $100 you're saving. It's worth noting that the TTB (left over in Treasury when the ATF got moved to DOJ) hates citizens as much as the ATF does, so their definition of a "complete rifle" is not the same as yours. If you buy all the parts at once most, if not all, vendors will attach the excise tax because the TTB will claim that merely putting parts in the same box constitutes creation of a taxable "completed rifle" that is being sold for a business use (the maker's profit) even though you have to spend hours working on it and assembling it before it can fire. Best to buy the lower (the stock part of the lock, stock, and barrel that are required for an item to be taxable) on a different day than the rest of the parts so they're never together until they get to your home. Or, better yet, buy the lower receiver from a different vendor than the rest of the parts. Then, you are producing it for your own personal use, and presto-chango, no excise tax. If you sell it, however, be aware that you may well be responsible for the excise tax if the feds ever want to put your pickle in a vise.
Of course, the FFL that does the transfer on the lower receiver is going to charge you for that service if you're not buying the weapon from them (unless the FFL is something like a range that you have a membership at that gives you free transfers) so it's likely going to be close to a wash on the all-in cost, but I thought I'd throw it out there.
This post was edited on 8/9/21 at 6:24 pm
Posted on 8/9/21 at 4:34 pm to Dave_O
the spring loaded locking pins are one of the biggest pain in the arse things you can ever deal with
Posted on 8/9/21 at 4:39 pm to Dave_O
Just buy a complete upper and a complete lower and literally snap them together

Posted on 8/9/21 at 4:39 pm to Huey Lewis
I too, am an AR dummy. So if I purchased a complete lower, and a complete upper, I just put them together, and it'll go bang?
Would some uppers and some lowers not fit together, or are they all universal?
Would some uppers and some lowers not fit together, or are they all universal?
Posted on 8/9/21 at 4:47 pm to Homey the Clown
quote:
I too, am an AR dummy. So if I purchased a complete lower, and a complete upper, I just put them together, and it'll go bang?
Yeah, but you have to put a bullet in it first. That's page 2 of AR for Dummies. The two halves of the rifle literally are held together with two 1/4" pins that have spring loaded detents in them to keep them from coming out of the rifle's lower receiver and getting lost. You use a bullet, a stick, a finger, whatever is handy to push the rear pin out of the way and the rifle will pivot on the front pin and give you access to all the working parts for repair and cleaning. Use the same stick to push the front pin out of the way and the upper and lower come apart. Eugene Stoner designed it to need no tools other than the rod from a cleaning kit or the tip of a bullet to open it up and get at the guts to make it very field serviceable. If your rifle goes down and you can find just the sub-assembly containing the broken component, you can swap it out yourself in less than 30 seconds and get back to business without the need for an armorer.
quote:They're pretty much all universal and built to the same dimensions because they're a milspec design. Manufacturer A's upper should mate to Manufacturer B's lower just fine. There is no guarantee that A and B have the same quality control, tolerances, etc., so they might fit very loosely and sloppily, or they may be tight enough to need some percussive persuasion to fit together. They should fit in the end, though.
Would some uppers and some lowers not fit together, or are they all universal?
As with all things, there are exceptions, though. The manufacturers are GENERALLY pretty good about letting you know if Tab B won't fit into Slot C.
This post was edited on 8/9/21 at 6:35 pm
Posted on 8/9/21 at 5:14 pm to jlovel7
Thank y’all. Every bit of this was helpful. Huey Lewis and tigerstuckinMS dumbed it down to my level, but I’ll take every bit in this thread and apply it. I feel like this will get me on my way.

Posted on 8/9/21 at 6:55 pm to Dave_O
I put together my first a few months ago. I went with a complete upper and stripped lower and build kit. I watched a couple YouTube videos and it was pretty simple to put together. The only tool you’ll really need is the armorer’s wrench. I did pick up the vise block just to make it easier and a new punch set since mine were scattered.
Even going super slow and watching the videos step by step along the way it only took an hour or so.
Seeing how simple it was made it that much easier when I decided to go ahead and put a good trigger in it later.
Even going super slow and watching the videos step by step along the way it only took an hour or so.
Seeing how simple it was made it that much easier when I decided to go ahead and put a good trigger in it later.
Posted on 8/9/21 at 6:55 pm to Dave_O
If you live near Lake Chuck if you order the complete upper and lower I'll finish putting them together for a nominal fee :)
Something to add. A lot of uppers will sell the BCG (bolt carrier group) and the charging handle separate.
Something to add. A lot of uppers will sell the BCG (bolt carrier group) and the charging handle separate.
Posted on 8/9/21 at 6:58 pm to Dave_O
Go to you tube and look up Larry Potterfield’s videos on it. He shows it in a Mr. Rogers-esque fashion. But he is clear and concise.
This post was edited on 8/9/21 at 6:59 pm
Posted on 8/9/21 at 9:08 pm to Dave_O
quote:
Thank y’all. Every bit of this was helpful. Huey Lewis and tigerstuckinMS dumbed it down to my level, but I’ll take every bit in this thread and apply it. I feel like this will get me on my way.
It’s addicting. Especially when you can just buy different uppers (along with appropriate magazines) and have a bunch of different calibers. I just got a new upper from Bear creek arsenal. They’re on the cheap side but all the reviews indicate they’re no frills and get the job done. I’m looking forward to using it and probably slowly upgrading it over time. Palmetto State Armory also hasn’t let me down yet either. They’re a little pricier but probably slightly higher quality and a little more polished as a company.
I haven’t gotten into anything high end yet but I haven’t had a problem with my budget tier stuff so far.
Posted on 8/9/21 at 11:10 pm to jimbeam
quote:
Just buy a complete upper and a complete lower and literally snap them together
This. Or just buy a complete gun and shoot. If you want to tinker with AR building as a hobby then fine but if you just want to own and shoot, just buy one.
Posted on 8/10/21 at 8:10 am to Dave_O
I had zero experience with AR's when I purchased the parts and built my first one. The hardest part for me was being overwhelmed at all the parts and trying to understand what to buy. The assembly is not that complicated if you are at all handy with basic tools. Plenty of YouTube videos out there to follow.
There are numerous ways to achieve a completed gun, from buying parts kits that include everything you need down to buying every single individual part separately. For your first one, i'd recommend using kits. It'll help you make sure you have everything you need, and once you see how it all goes together then you can get more adventurous on the next build. Summary below on the basic parts you need, will include a link to an example of each one.
Lower - Option 1
1) Stripped Lower Receiver (Requires FFL Transfer) LINK
2) Lower Build Kit (Typically includes every part you need to assemble the lower) LINK
Lower - Option 2
1) Stripped Lower Receiver (Requires FFL Transfer) LINK
2) Lower Parts Kit LINK
3) Stock & Buffer Tube Kit LINK
Lower - Option 3
1) Stripped Lower Receiver (Requires FFL Transfer) LINK
2) Lower Parts Kit Without Fire Control Group LINK
3) Trigger Set/Trigger Group/Fire Control Group LINK
4) Stock & Buffer Tube Kit LINK
Upper
1) Stripped Upper Receiver (With or Without Forward Assist) LINK
2) Ejection Port Cover Assembly LINK
3) Forward Assist Assembly (Depending on item 1) LINK
4) Bolt Carrier Group LINK
5) Charging Handle LINK
6) Barrel (Can't go wrong with a 16" barrel, anything shorter read up on laws regarding Short Barrel Rifles vs Pistols. Also read up on gas systems for which ever barrel length you choose.) LINK
7) Barrel Nut (Some free float rails item 8 require specific barrel nuts to mount them) LINK
8) Free Float Rail (Recommend m-lok style, length dependent on barrel length and visual preference) LINK
9) Muzzle Device (flash hider, muzzle brake, etc. make sure the thread size matches your barrel) LINK
10) Gas Tube (make sure it matches the gas system your barrel is designed for I.E. Pistol, Carbine, Mid-Length, Rifle) LINK
11) Gas Block (make sure it matches the gas block diameter on your barrel, and that it will fit under your free float rail) LINK
For tools i'd recommend the following:
1) Armorer's Wrench LINK
2) Roll Pin Punch Set
3) Upper Receiver Vice Block (You can get away without a lower receiver vice block) LINK
4) Vice
5) Torque Wrench
6) Pivot Pin Tool (Not required but highly recommend) LINK
Hope i'm not forgetting anything here, and hope this simplifies what you need to buy. If you have any questions on what parts to buy, just ask them here. There's nothing I enjoy more than shopping for AR-15 parts with other people's money
This post was edited on 8/10/21 at 8:11 am
Posted on 8/10/21 at 9:15 am to Dave_O
The main thing that you should be concerned about with building your first is that it will be just that, your 1st, because they will multiply, sometimes exponentially.
Posted on 8/10/21 at 9:27 am to bbvdd
So when I pull up the PSA website, and search for complete lowers and complete uppers, I find a complete lower for $150 and a complete upper for $330, both PSA brand. I can buy these two items, and have a complete AR build for $500?
Posted on 8/10/21 at 9:52 am to Homey the Clown
quote:
I find a complete lower for $150 and a complete upper for $330, both PSA brand. I can buy these two items, and have a complete AR build for $500?
As long as the upper has BCG and charging handle, yes.
Still need to get sights whether iron sights or optics.
Posted on 8/10/21 at 10:59 am to Homey the Clown
quote:
I can buy these two items, and have a complete AR build for $500?
EDIT: The below is if the upper doesn't come with those items, of course. I believe PSA is one of the companies that often includes these with completed uppers, so if what you're looking at already has a BCG/charging handle and sights included, then you likely won't need to buy additional stuff. Need and want are two different things, though...
Probably more in the $800-$1200 range after you add the items bbvdd mentioned that don't come with the upper that you'll need for the rifle to be functional and able to hit what you want to hit.
Figure $150 to $300 for a bolt carrier group and charging handle, depending on exactly what you pick. Then figure another $150 to $400, depending on the optics you choose. The low end of that would be what you can expect to pay for a set of dependable iron sights and the higher end of that scale would get you something like an entry level 1-6 Low Power Variable Optic (LPVO) scope.
Of course, you can easily spend WAY more than that for those two pieces of kit, but given the price range of the upper and lower you're looking at, the prices I mentioned seem about right for what you'd likely select to go on that rifle.
This post was edited on 8/10/21 at 11:10 am

 Page 1 of 6

Popular
Back to top